Website ReSizer, available to businesses and organizations of all sizes,brings in perfectly sized web pages to a Facebook tab or within a web page.
It’s a solution for every companythat spent money investing in their website and thenwished they had the same functionality on in other locations.
Simply add the website to your fan page tab, resize to your liking so it all fits nicely, and publish!
No more gaudy iframe scroll bars! Most websi
TabSite enables marketers and owners to reach more people, engage their community, and capture more leads. All to help grow your sales process stronger!
Review appfeatures and pricingthen once a plan is selected you will be taken to the manager.
FIRST STEPS
Upon signing up you are taken to the manager in the "Add App" area. Review the different apps and select to "Add" a app. This opens up the setup for the App. Existing user
Photo Contest
Create Viral Photo Contests where visitors or Admins can upload their photo entry for your fans to vote on!
Multiple voting options are available including single vote, daily voting, or a set number of votes per contest. Select this option to begin creating a photo entry contest. If you want to only useAdmin Entries, make sure to select the "Use only Page Admin Entries" toggle. By removing the "v
Canvais a powerful online design tool enabling non-designers and professional designers to easily create customized images to use. TabSite has partnered with Canva as a early beta release partner to integrate the Canva Designer into the manager area of each App.
What is the Canva Button?
In short, Canva access and power within web-tools like TabSite!
Instead of just offering an ‘Upload’ button and leaving users on their ow
Use the Landing Page app to build a conversion form for email opt-ins, eBooks, events, deals and more. Build out the form with fields including text areas, dropdown menus, and checkbox options to ensure you get the fields your business needs to capture. Customize the URL page name and easily add optional Retargeting and Conversion tracking codes to track the ROI of your campaign. Mobile respon
Have visitors and fans enter for a chance to win!
Keep them coming back with weekly or regular giveaways.
Sweepstakes allow visitors to submit entries during a promotional time period. Each entry is e-mailed to you. From the entries you can pick a winner. Users can view/capture/export data and use the system tools to randomly select up to 5 winners.
KEY FEATURES OF TABSITE SWEEPSTAKES:
Set the "Go-Live" Date and End Date
Pre-Sweepst
....boost the reach of the promotion by having entrants incentivized to gain more entries by sharing it with Facebook friends!
SWEEPSTAKES PLUS IS A POWERFUL PROMOTION APP THAT IS VIRAL BY NATURE.
Setup a sweepstakes with form for fans to enter to win a prize. The winner is chosen randomly but entrants that share via Tweeting get more entries! All of this is tracked for you.
The viral poweris tha
Photo Contest
Landing Page App
Sweepstakes
Form and Survey App
Sweepstakes Plus
Coupon App
Essay and Video Apps
The Mailchimp integration is within any app that offers a form (except Drag N Build which is a unique app).
Simply go to the Integrations section (in left menu).
Then select "Enable" on the Mailchimp option. This open
This Smart / mobile friendly url, when used in a post to the wall or any other time when clicked by a person using a mobile phone, directs the viewer to a mobile friendly view of the custom app. Desktop viewers continue to have the same experience of viewing the custom app when they click on the mobile friendly url.
WHY A "SMART URL?"
Since Facebook'
The Group Deal Engagement App offers Page Admins an advanced deal based on group involvement. Like others sites such as Groupon, the deal is not available until a minimum number of fans have acted on it and Admins can set how many total Deals are going to be offered. Group Deal is offered at the Platinum Plan level.
The Summary:
A fan comes to the tab and sees it is going to take 50 registrants to unlock the idea. They want in so they click to Share the deal with their friends. This opens up a form so that that they can register. The form data is submitted and if the registrants reaches 50, then the deal is on. The Page Admin can export the registrants information via the csv export at top right of the Group Deal setup area in the manager and then contact/e-mail the registrant the deal ticket/code/coupon, etc. That part is on you, we give you the socially engaging mechanism to setup and manage a group deal.
If the time set for the deal expires or the deal limit on total offered is reached, the "Share to reveal" and form are removed and are no longer accessible.
This tab offers:
- Ability to add a 650 x 363 Group Deal details image. Simply explain your deal offer in the image.
- Ability to set Registrations Required before deal is active and ability to set a limit on the number of deals that will be available. (This sets a cap so you can offer larger deals but limit the quantities. The Share and form disappear so no more can enter and the deal say it has expired.) In addition, there is ability to set a end date of when the deal is no longer active and available.
- Email alerts for each entry and notification when the deal has reached the required registrations and is active.
- Admins can add a "Deal is Over" image ( 650 x 363 px) that will appear in the time period expires or if the maximum number of deals offered has been reached.
- Social sharing options to encourage fans to share your tab. Admins can set the sharing core information for the Share button, Pinterest Pin, +1 and Tweet to strengthen the message from your Page that goes out when fans share the information. The Like, Share, and +1 pull from the Title, Description, and Image fields, and the Tweet text has a counter to help you stay within a 140 character limit.
- A Like Gate image option that should be loaded at 810 x 810 pixels.
- Platinum Plans have the Promotional Tools area active enabling Admins to more easily drive traffic to their tabs from their website or blog by allowing you to upload an image and grab embed code to add to your blog or site. This image call-out will link to the Facebook Page Tab.
- In the Advanced Configuration area, there is ability to customize the text and language for form capture, response message, and text instructions so it can be used globally easily.
- Export registrations: The top right of the setup area offers a quick export tool for all registrations captured.
Sample Group Deal:
First, make certain that you select the Manager section and then select the Add App.
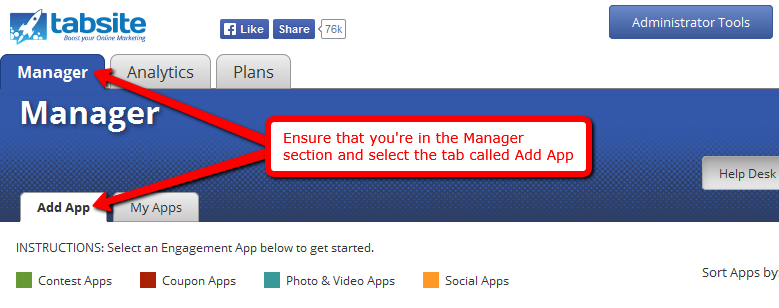
Next, scroll down the page and stop at the Coupon Apps. Search for the Group Share Deal App and click the Add+ button.

NOTE: Canva is now integrated in TabSite to allow you to custom template images in your app! Use Canva's or create your own by clicking the Canva button. Read more here.
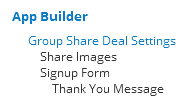
After clicking the App+ button, you will be directed to the App Builder page. There are four sub-settings included in this section; Group Share Deal Settings, Share Images, Sign-up Form and Thank You Message.
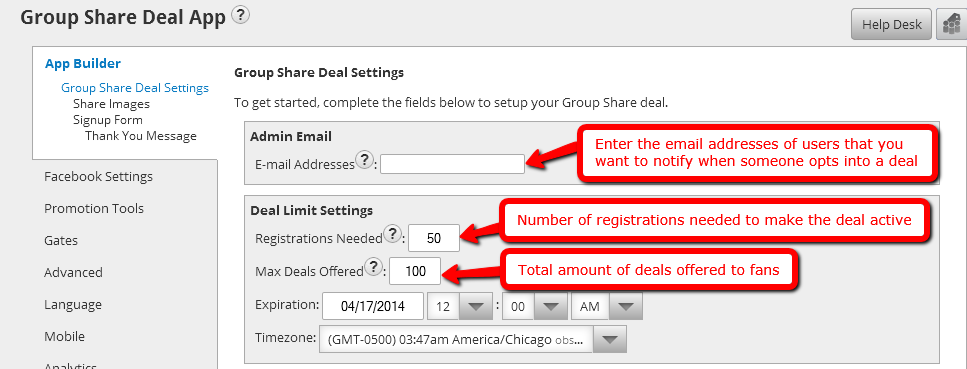
The first sub-setting is the Group Share Deal Settings. There are three parts included in the section; Admin Email, Deal Limit Settings and the Group Share Details.
The first part is the Admin Email. You will be requested to key in the email addresses of the users that you want to be alerted when someone chooses to enter the deal. If you are entering numerous email addresses, you can separate each one of them using commas.
The second part is the Deal Limit Settings. You will be required to enter the values for the "Registrations Needed" and the "Max Deals Offered". The former deals with the number of registrations needed to activate the deal. The same with Groupon, the aim is to get visitors to opt in and to get them to share it with friends, so that others opt in and the minimum deal is reached to make it active. Next, you must download the email addresses and send out the deal using your email platform. The second option of this box is setting the offered deals to fans; there will be no limit if it is set to zero. Also, you can set the expiration date and the time zone.
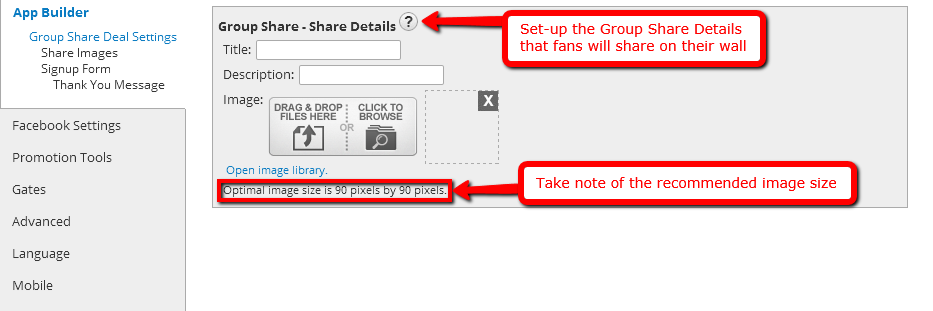
The third part is the Group Share - Share Details. Simply set-up the Group Share Details that fans will share in their wall. Enter a simple title, distinct description and a photo that captures the essence of the promo. We recommend that you upload a 90 by pixel image.
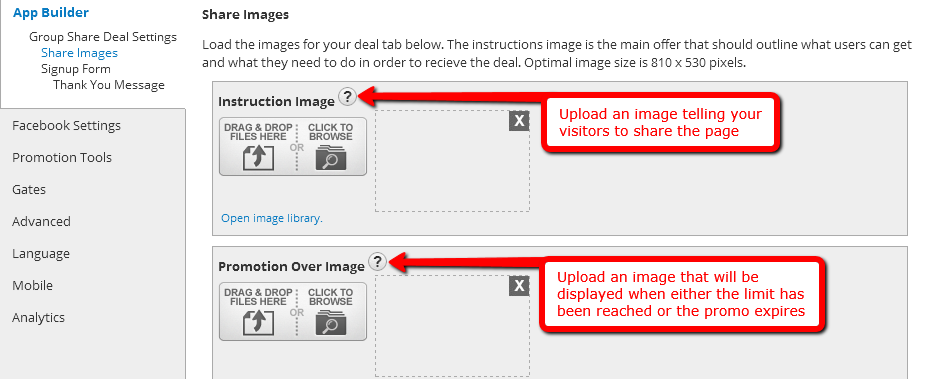
The second sub-setting is called Share Images. There are two parts comprising this section; the Instruction Image and the Promotion Over Image.
The Instructions Image is the primary offer that should summarize what users can obtain and what it is required to do so as to accept the deal. Take note that the ideal size for the instruction image is 810 x 530 pixels.
The second part is the Promotion Over Image. You will need to upload an image that will be exhibited when either the promo expires or the limit has been reached. The recommended image size is the same with the Instruction Image.
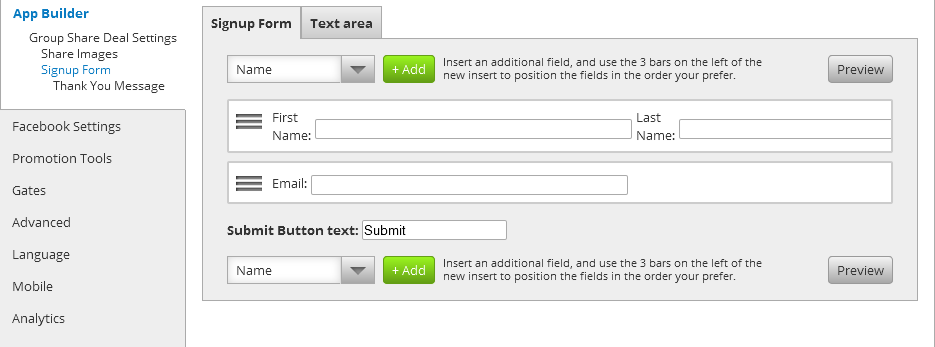
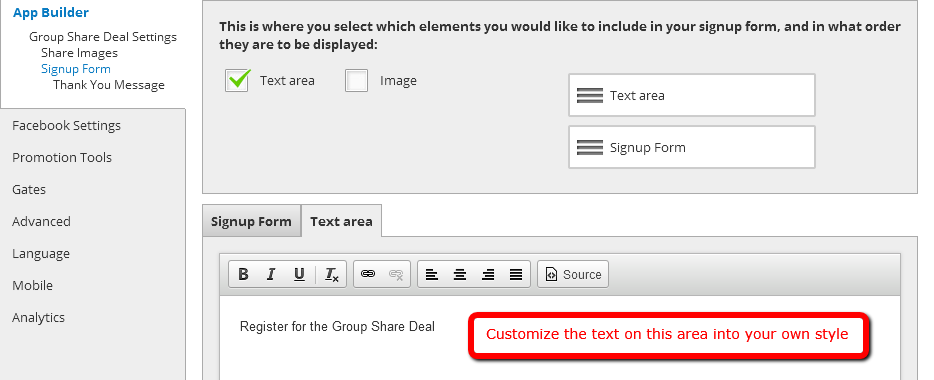
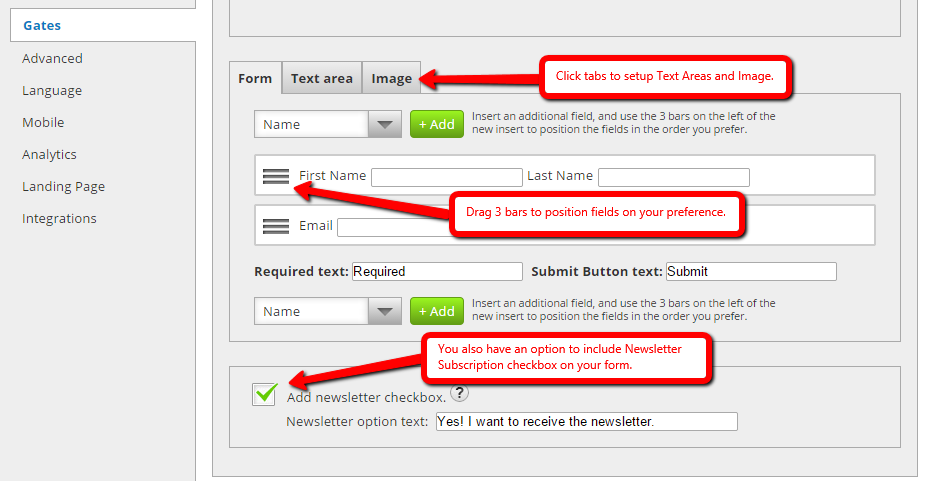
The third sub-setting of the App Builder is the Sign-up Form. Choose the elements you would prefer to incorporate in your sign-up form and the specific order you want them to be exhibited.
Customize the Submit Button text and the Text area by replacing rhem with your preferred text version.

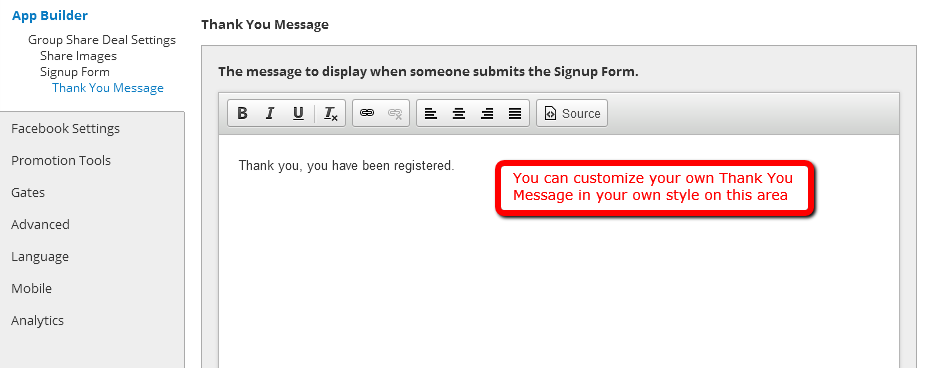
The Thank You Message sub-setting is the fourth one in the App Builder. When someone submits the Sign-up Form, this message will display. Customize the text with the way you prefer.
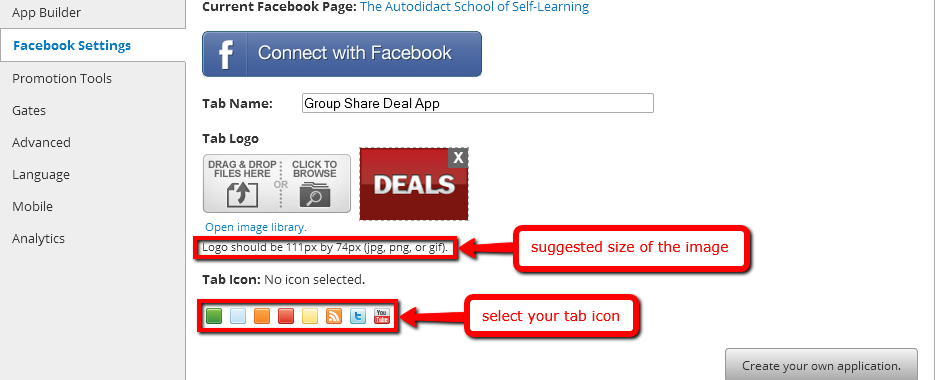
With the help of the Facebook Settings, you will be able to publish your app to Facebook in a form of a tab. You'll just have to connect your Facebook fan page to this app, specify your tab name, 111 x 74 pixel logo and icon.
There is a button in the lower-right portion of the page called Create your own application which does what its name says. After creating the app, you'll be required to enter the App ID and App Secret on their respective blank fields.
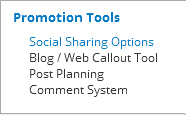
The third one is called Promotion Tools. In this portion, there are four sub-settings that can be modified. They are Social Sharing Options, Blog/Web Call-out Tool, Post Planning and Comment System.
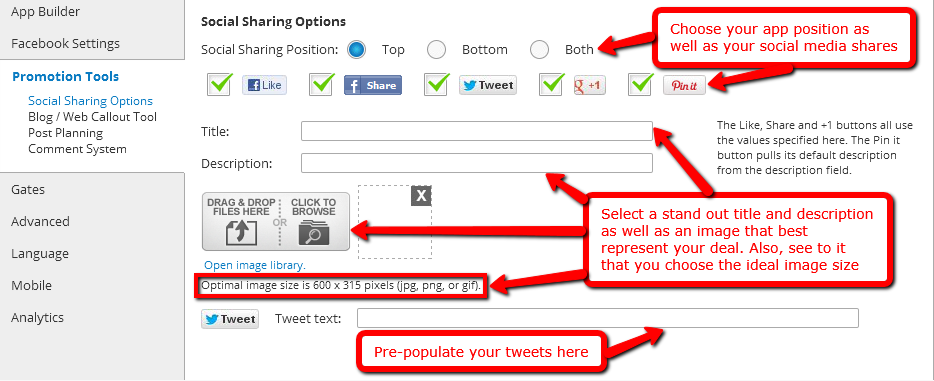
The first sub-setting of the Promotion Tools section is Social Sharing Options. In this area, you can prepare your app for social sharing. You are able to decide the social networks you would like to connect your app with as well as the position of the tab on the page (top, bottom or both).
Customize your title and description being as attention-grabbing as possible. Choose an image that best represents the deal. The suggested dimension for the image you'll be uploading is 600 x 315 pixels in any of these formats: gif, png or jpg.
Control the engagement process of your connected social media platforms such as your Facebook's Likes and Shares, Twitter's pre-set tweets, Google+'s +1 and Pinterest's Pin it button.
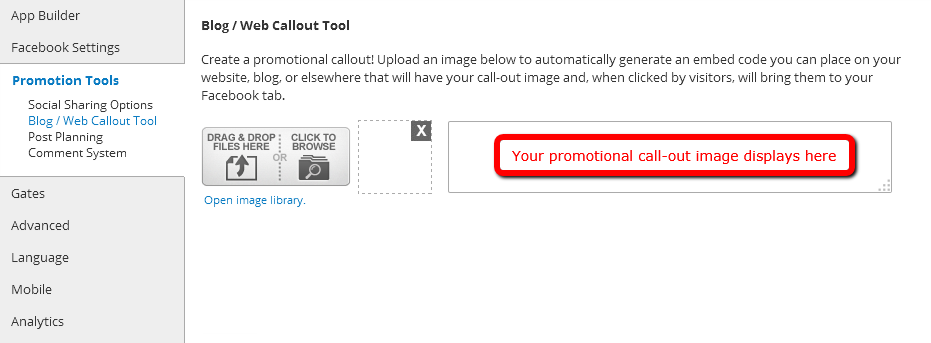
With the use of the Blog/Web Call-out Tool, you'll be able to create a promotional call-out. When your call-out image is placed on a blog/website and when visitors click on it, they will be forwarded to your fan page, as a result, giving you tons of traffic. In order to create one, you have to upload first an image you'll be using. Then, an automatically-generated embed code will be shown next to the uploading area. This code carries your call-out image to the sites you'll be posting.
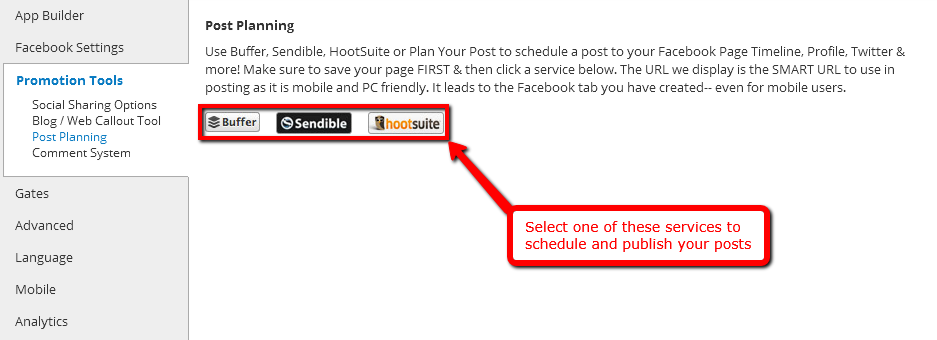
The Post Planning sub-setting allows you to schedule as well as publish your posts to social media sites. We offer three types of scheduling services specifically Sendible, Hootsuite and Buffer. We use the SMART URL when displaying since it is mobile and PC friendly. It forwards your visitors to your created Facebook tab.
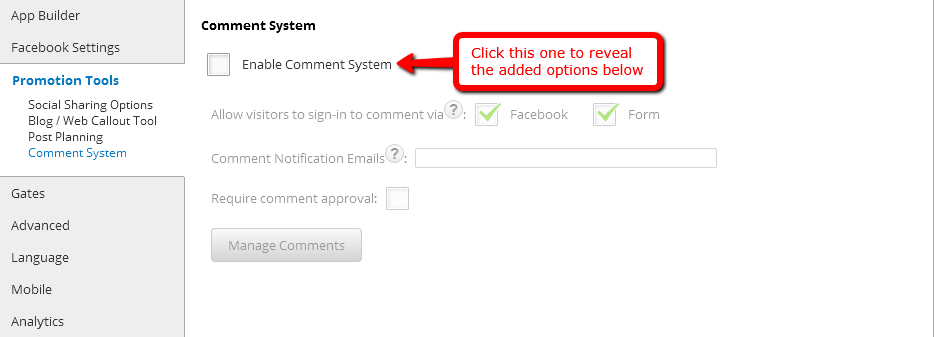
The Comment System sub-setting is the last one on the list of the Promotion Tools. It lets you customize your comments' options. First, tick the Enable Comment System to reveal the further options below.
The first option is known as "Allow visitors to sign-in to comment via" where it gives you two choices as to which signing-in process you prefer, via Facebook or via Form. The second one is called "Comment Notification Emails" in which you can include in its provided box the email addresses of the users you want to alert when a new comment is posted. The last item is called "Require comment approval" where it can give you the authority to accept or reject the submitted comments. There is a button underneath named "Manage Comments" that exactly does what its text says.
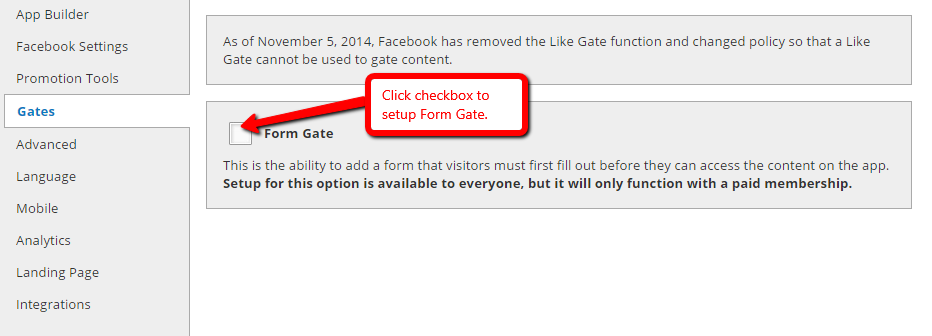
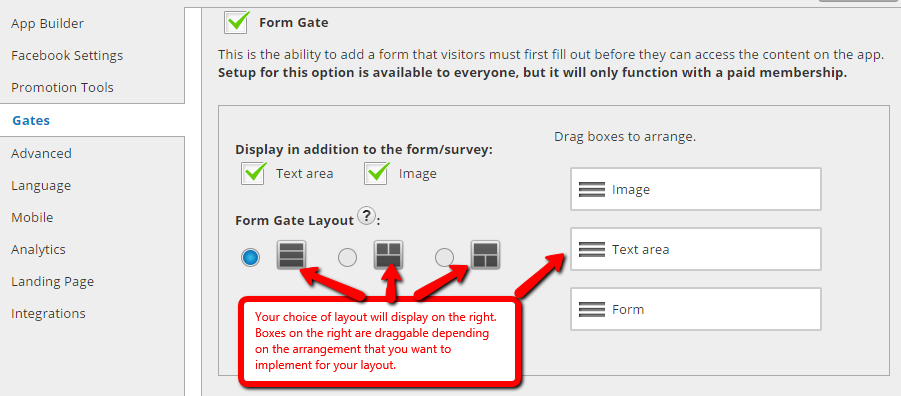
Form Gate is a simple form that users must complete and submit in order to access your app content.
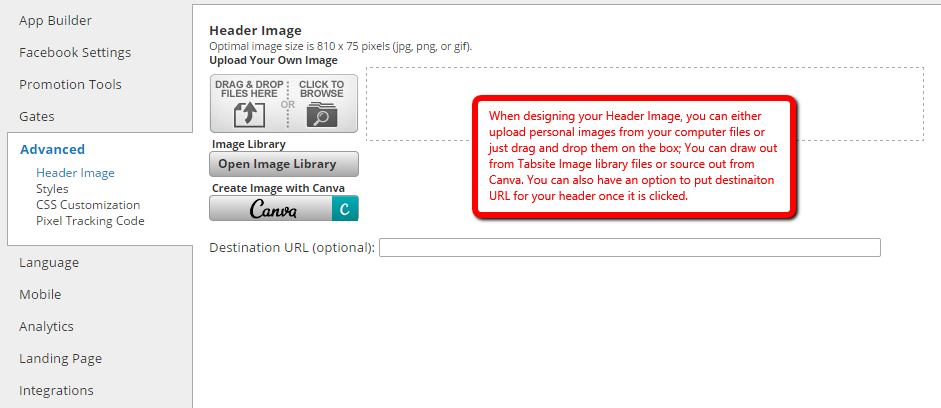
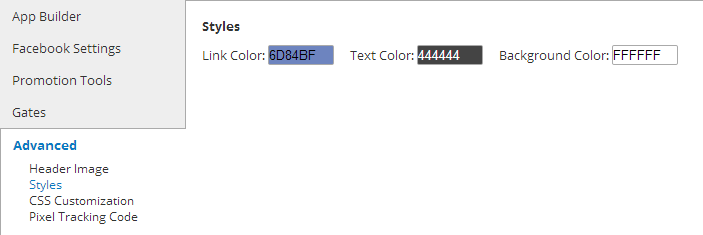
The Advanced setting lets you upload a Header Image for your tab. Also, it enables you to customize your tab styles like the Link Color, Text Color and Background Color. Lastly, you are also able to customize your app's CSS. The default styles related to your app are already provided by us.

Another feature to help you with marketing is to implement remarketing pixels! We have a Pixel Tracking code area for Facebook and/ or Google Ads. By installing the pixel code from those services, you are then able to target visitors to your promotion back on that service with ads. Simply paste the pixel tracking code that they provide.

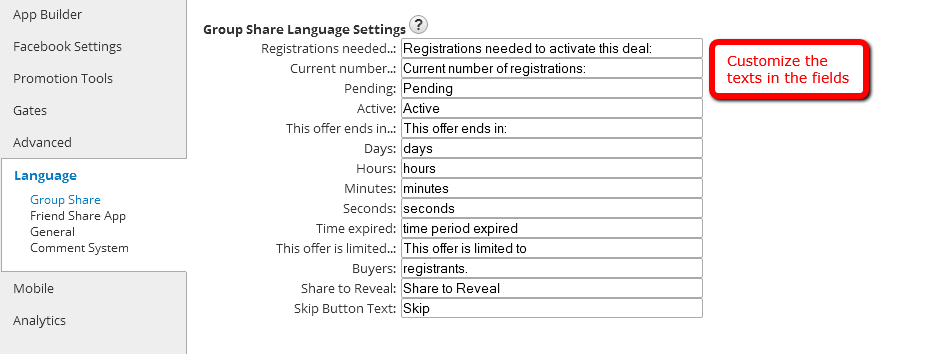
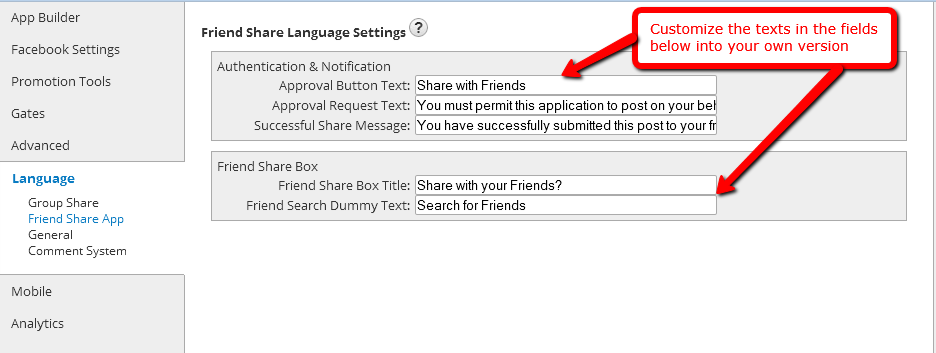
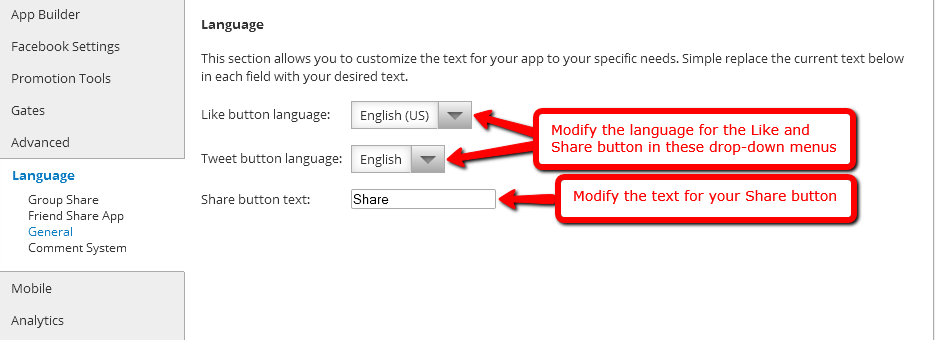
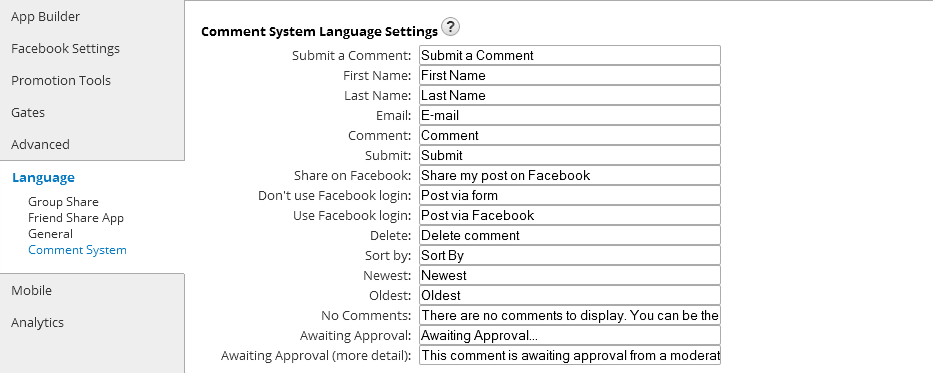
The Language setting has four sub-settings. These include the Group Share, Friend Share App, General and Comment System.
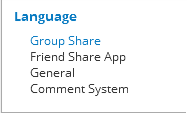
Simply customize the default texts written on the fields of the Group Share Language Settings with your own version.
Customize the default texts just like what you did in Group Share.
The General sub-setting for Language contains two drop-down menus. They are the "Like button language" and "Tweet button language". Both of these menus comprise a list of the several languages we offer, just choose the one you like. Also, you can modify the default Share button text if you like.
Just like what you did to the Group Share and Friend Share App, customize the following fields to your preferred version.

The Global Options make up the Mobile Settings. It has two mini-options which are answerable by Yes or No. The first option is called "Render desktop version on mobile" where it gives mobile users the chance to access the app in a mobile-alternative version and the "Use like gate on mobile devices" which gives them the benefit of using the Like Gate Image on their mobile devices.

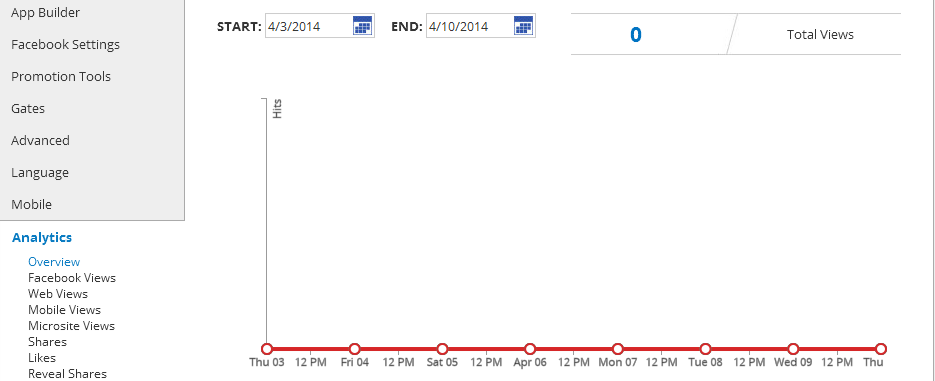
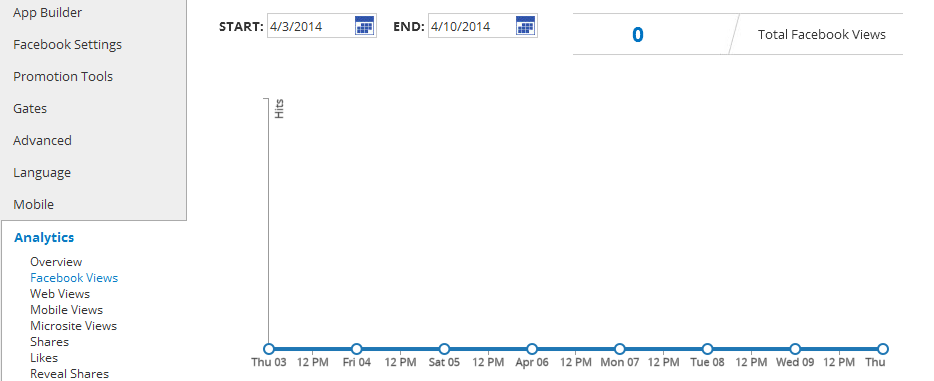
The Analytics setting is the last one on the list. It has various graphs that displays the amount of traffic entering the site coming from different sources. These graphs are composed of Overview, Facebook Views, Web Views, Mobile Views, Microsite Views, Shares, Likes and Reveal Shares.
Overview Graph
The graphs of Facebook Views, Web Views, Mobile Views and Microsite Views all look like this one
The amount of Shares/Likes/Reveal Shares the app is acquiring shows like this one
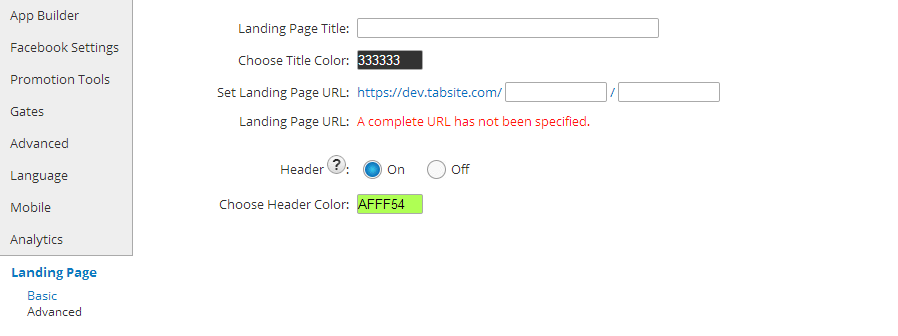
Landing Pages are a powerful feature allowing you to create lead capture pages using any app.
Create your own landing page directory name for your use on any landing pages. You create a name specific to your business such as https://tabsite.com/mybusiness/summerpromo(where "mybusiness" is your business name and the landing page is "summerpromo".)
Landing pages are the perfect area to drive traffic to in order to create more leads. Any app can have a Landing Page.
You may also change the title and header font color.
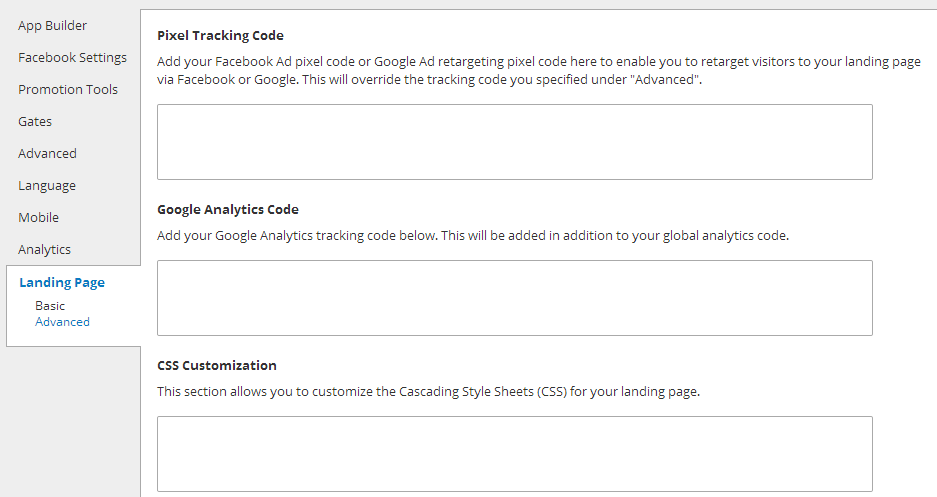
We give you the option to place the Pixel Tracking code for Facebook Ad's and/or Google Ad's on your landing page. This allows you to retarget/remarket to visitors via ads on those services.
In addition, we also offer CSS control for advanced styling of your Landing page as well to use if desired.
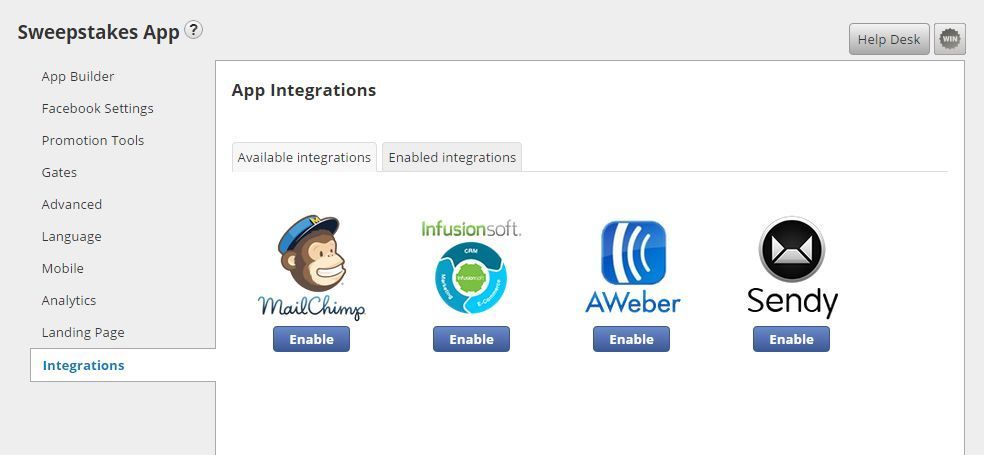
Integrations:
The "Integrations" area offers options for connecting forms to other services like Mailchimp, Infusionsoft, AWeber and Sendy.
See full details on the Mailchimp integrations here with steps for setup so that your form data is automatically added to your service provider.
See full details on the Infusionsoft integrations here
See full details on the AWeber integrations here
Click the "Save" button if you are already done doing all the necessary adjustment with the settings
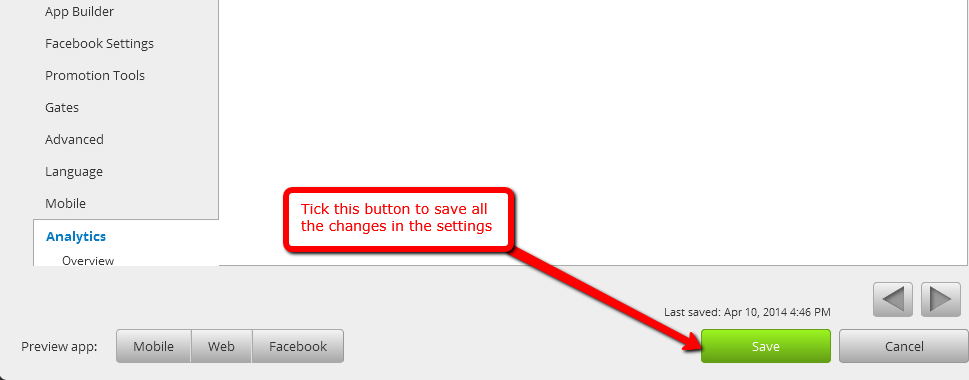
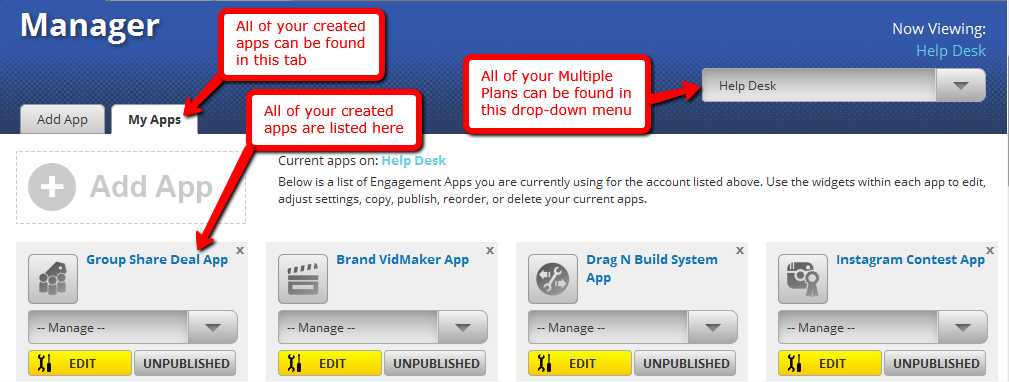
After clicking the save button, you will be directed to the My Apps Page. Here, you will see all the apps you made. You can also add another app, test it and publish it according to the features of your Plan.
Tick the "Publish" button to go through the procedure of placing your app to Facebook or in your website.
