Home / Help Desk / Website ReSizer App
Website ReSizer App

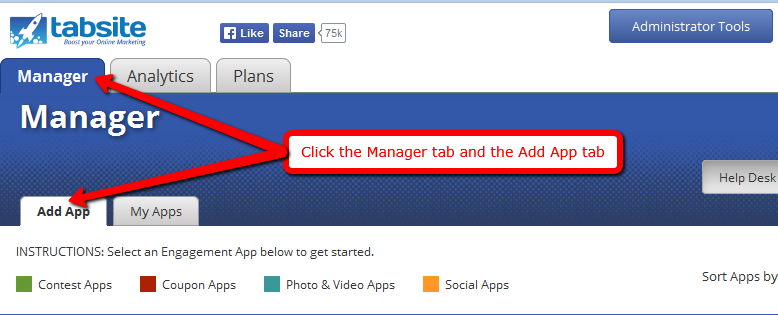
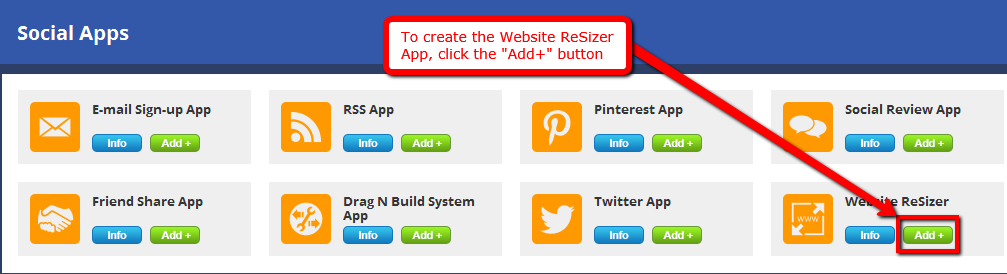
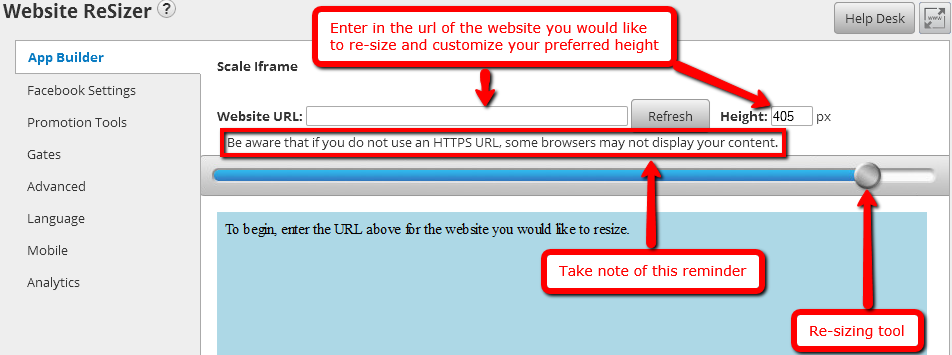
Website ReSizer, available to businesses and organizations of all sizes, brings in perfectly sized web pages to a Facebook tab or within a web page.

It’s a solution for every company that spent money investing in their website and then mikeg-smexaminer-post
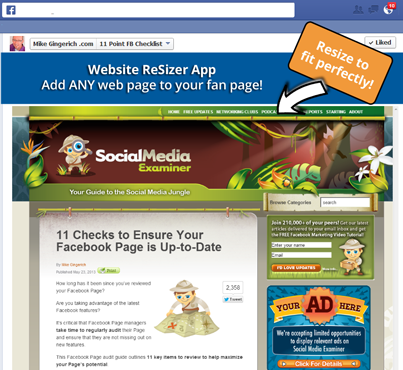
wished they had the same functionality on in other locations.

Simply add the website to your fan page tab, resize to your liking so it all fits nicely, and publish!

No more gaudy iframe scroll bars! Most websites are at least 1000 pixels wide while Facebook tabs maximum width is 810 pixels.  This difference led to iframed sites in tabs that had bad scroll bars and poor user experience.  NO MORE!  Now, add any web page, shopping cart, landing page, blog, etc.and use the TabSite Website ReSizer app to make it fit!  Allow fans to shop from your website right on Facebook! That's just one use!
Website RESIZER - Select Platinum Plan
INSTRUCTIONS:
 
In creating the app for Website ReSizer, the first thing you'll have to do is click the Manager section and select the Add App tab:
 
The next step would be to scroll down the page and stop at the Social Apps section. Then, locate for the Web ReSizer App.
 
NOTE: Canva is now integrated in TabSite to allow you to custom template images in your app! Use Canva's or create your own by clicking the Canva button. Read more here.
 
When you have already ticked the Add+ button, the page loads and eventually leads you to the App Builder settings page. You are required to enter in a website URL and your desired height of the image. Upon clicking the "Refresh" button, the site image will display in a designated preview area below. You can adjust the size of the image by the use of a built-in slider.
NOTE:  A secure (https) URL is highly recommended to ensure it is visible in all browsers.
 
 
The Facebook Settings allow your app to be published to a Page tab. Simply indicate the fan page you'll be linking, your preferred tab name, a recommended 111 x 74 logo image and finally, an icon to represent your tab.
 
The Promotion Tools consist of four sub-settings, they are Social Sharing Options, Blog/Web Callout Tool, Post Planning and Comment System:
 
The first sub-setting is Social Sharing Options where you are able to share the app to different social media platforms. To name some, we have Facebook, Twitter, Google+ and LinkedIn. You'll just have to adjust it to where you want it to be placed, either on the top portion, the bottom portion or both portions.
 
Being the Administrator of the page, you are in-charge of the Facebook and Google+ Shares as well as pre-populating the tweets on Twitter. All you have to do is fill-in the title, description, upload a 600 x 315 pixel image. The social networks you have included for sharing will use this image.
 
 
Using the Blog/Web Callout Tool, you are able to create your personal call-out for promotion.  An embed code will be automatically-generated once you upload a photo. Site visitors will be brought to your Facebook tab when they click this image. 
 
The Post Planning sub-setting is the third one from the Promotion Tools.  It lets you schedule posts coming from various social media platforms namely Buffer, Hootsuite and Buffer. The provided URL is the one displayed by the app for the reason that it is responsive to PCs and mobile-users. It forwards you to your created FB tab.
 
 
The last sub-setting in the Promotion Tools is the Comment System. It has an option where if the check-box is ticked, additional options will show up.  These added options consist the following: "Allow visitors to sign-in to comment via Facebook or Form", "Comment Notification Emails" and "Require Comment Approval." Tick the Manage Comments button below these options:
 
Form Gate is a simple form that users must complete and submit in order to access your app content.  


The fifth setting is called Advanced. Upload an image of 810 x 75 pixels, modify the link color, the text color and the background color. The CSS of your app has a default style which you can also set to modify.
 
 
Another feature to help you with marketing is to implement remarketing pixels!  We have a Pixel Tracking code area for Facebook and/ or Google Ads.  By installing the pixel code from those services, you are then able to target visitors to your promotion back on that service with ads.  Simply paste the pixel tracking code that they provide.
 
 
The next setting is for the Language. It comprise of two sub-settings specifically General and Comment System
 
The first sub-setting for Language is called General. The options that comprise this section are the Like button language and Tweet button language. These buttons are in the drop-down menu format with several language selections. Even if the default language is English, you can still change it from the drop-down list and activate it to your social media platforms. Underneath these menus is a blank field where you can modify the text you would like to display in the Share button.
 
You can fill-in the input information on the input boxes for the texts you want to display for your Comment System in the second sub-setting. This sub-setting have two parts, the first one is the Comment System Language Settings and the second one is intended for the Errors.  This allows you to customize text and modify to the language you need.
 
The seventh setting is for Mobile. There are two Global options namely "Render desktop version on mobile" and "Use like gate on mobile devices." It allows users of mobile devices to utilize the content of the app on their mobile devices or display the similar details. Remember that not all apps possess mobile differences.
 
The final setting is Analytics. It offers the details on what time of the day the app performs better. The graph representations that can be viewed in this setting include Overview, Facebook Views, Web Views, Mobile Views, Microsite Views, Shares and Likes.
 
This is how the Overview graph displays on the screen.
 
This is how the graphs of Facebook Views, Web Views, Mobile Views and Microsite Views appear on the screen:
 
For the graphs used for Shares and Likes, this is how it looks like:
 

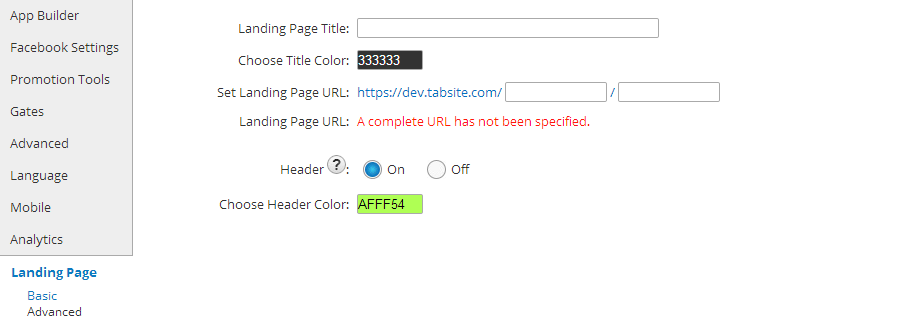
Landing Pages are a powerful feature allowing you to create lead capture pages using any app. 

Create your own landing page directory name for your use on any landing pages.  You create a name specific to your business such as https://tabsite.com/mybusiness/summerpromo(where "mybusiness" is your business name and the landing page is "summerpromo".) 

Landing pages are the perfect area to drive traffic to in order to create more leads.  Any app can have a Landing Page.  


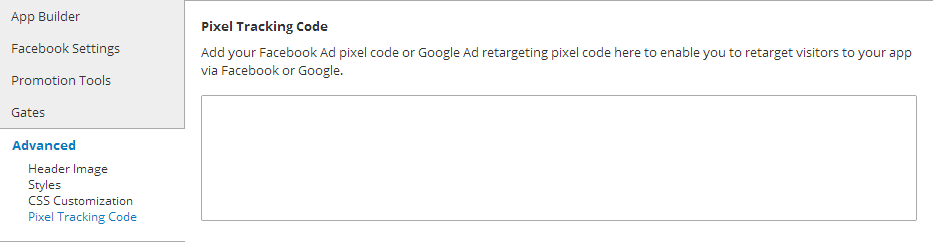
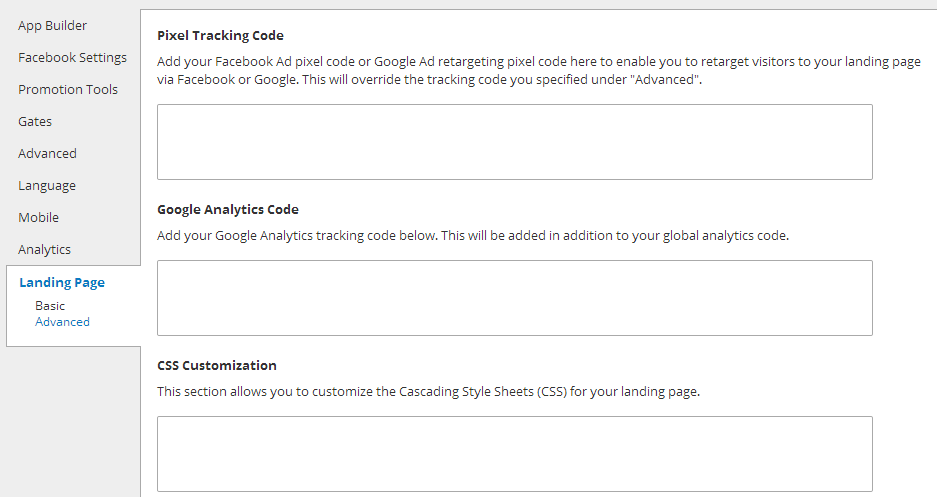
We give you the option to place the Pixel Tracking code for Facebook Ad's and/or Google Ad's on your landing page.  This allows you to retarget/remarket to visitors via ads on those services.  

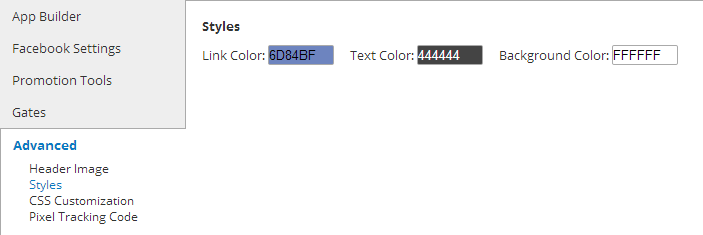
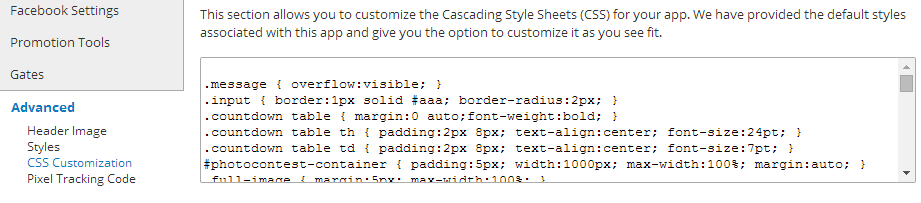
In addition, we also offer CSS control for advanced styling of your Landing page as well to use if desired.
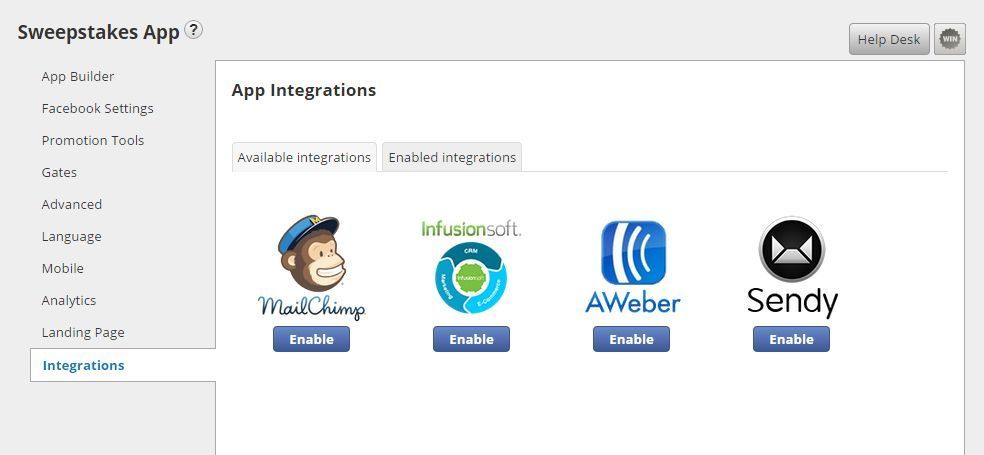
 

Integrations:

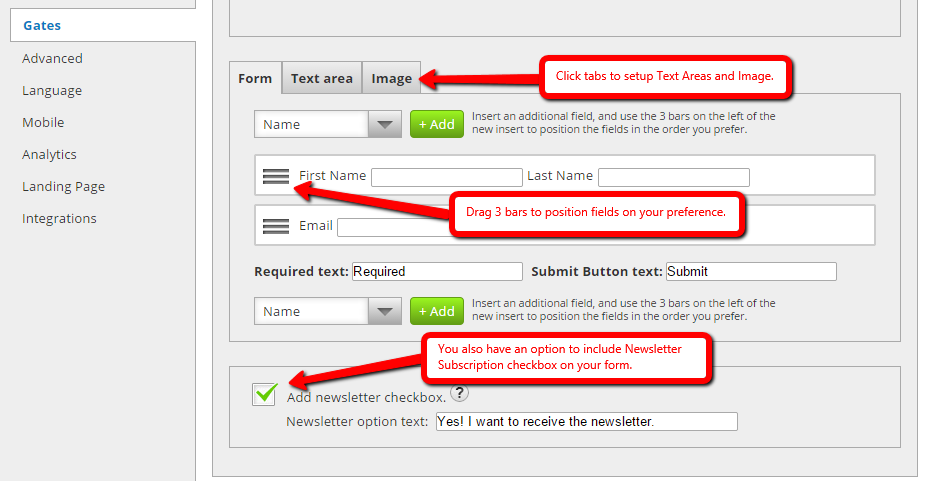
The "Integrations" area offers options for connecting forms to other services like  Mailchimp, Infusionsoft, AWeber and Sendy.

See full details on the Mailchimp integrations here with steps for setup so that your form data is automatically added to your service provider.

See full details on the Infusionsoft  integrations here

See full details on the AWeber integrations here


After modifying the settings, simply click the "Save" button located at the bottom-right corner of the page.
 
Upon pressing the "Save" button, the page will lead you back to the My Apps tab. All the apps you have  created can be viewed here.  In keeping with your Plan features, you are able to create, test and publish the apps.
 
Simply click the "Publish" button to undergo the publishing process of the Website ReSizer App.