Instagram Photo Contest App for Facebook Pages from TabSite
NOTE: 6/2016 Due to changes by Instagram this Instagram Contest app has been forced to be discontinued.
The Instagram Photo Contest App is designed to help social marketers empower their mobile toting fans to participate in Instagram Photo Contests hosted on their website or Facebook Page. Add to a Facebook Page and/or embed on your website or blog!
With the marriage (acquisition) of Instagram by Facebook, the Instagram mobile app has gained new clout and status as a social sharing tool. The fact that it integrates easy cross posting of Instagram images to Facebook, Twitter, and Tumblr certainly only helps as well!
Now Facebook marketers can capitalize on this fast growing social media tool by hosting Instagram Photo Contests!
The App allows Page Admins to setup a custom tab on their Facebook Page to host the Instagram Photo Contest. Visitors will enter the photo contest by submitting a photo to Instagram with the designated hashtag in the image description. The Admin sets this hashtag during setup.
The TabSite Instagram App will pull in all images for the hashtag from Instagram within the date range specified in the contest settings and visitors can then vote for their favorite entry. Perfect for the mobile savvy social community, this app enables Facebook Pages and also website to capitalize on the use of Instagram and the power of a contest promotion.
KEY FEATURES:
- Admin sets Instagram hashtag used for the entering the Contest
- Images with the hashtag are included by a date range set by the Admin
- Like all TabSite apps, there is ability to customize to any language
- Admins have the option to pre-approve all entries before they are live on the contest app if desired
- There is ability to setup a pre-contest countdown and post-contest display of winner(s)
- Ability to add a Like Gate on the tab to ensure a Like of the Page in order to be able to vote
- Social Sharing tools to enable entrants and voters to spread the message of their favorite entry to Facebook Twitter, Pinterest, and Google +
- Ability to view all voters and export contest vote data via csv file
- Smart URL to enable Facebook mobile users to view entries and vote
Each entry has a link to the Instagram user that submitted it. A winner would be contacted via Instagram.
INSTRUCTIONS:
First, go into the Manager section and then select the Add App tab.
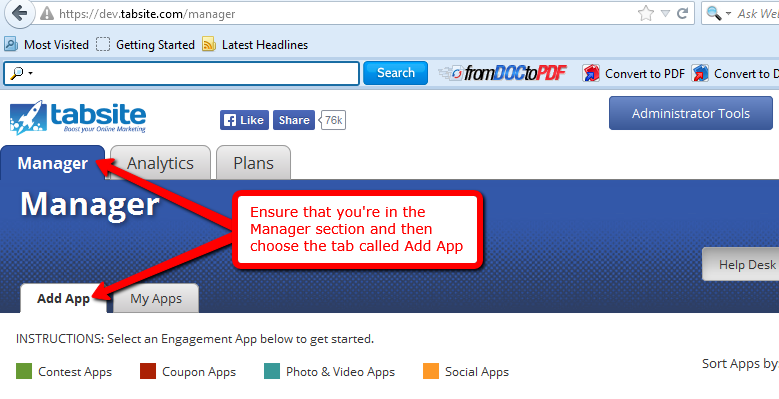
Then, scroll down the page until you reach the Contest Apps area. Look for the Instagram Photo Contest App and then click the Add+ button.

NOTE: Canva is now integrated in TabSite to allow you to custom template images in your app! Use Canva's or create your own by clicking the Canva button. Read more here.
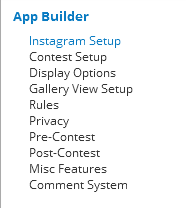
After ticking the Add+ button, you will then be directed to the App Builder page. It has ten sub-settings namely Instagram Setup, Contest Setup, Display Options, Gallery View Setup, Rules, Privacy, Pre-Contest, Post-Contest, Misc Features and Comment System.
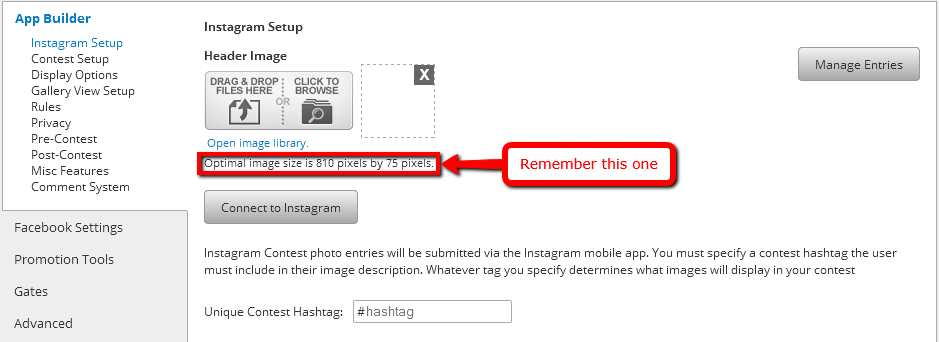
The first sub-setting is Instagram Setup. You can add an overall tab header image if you desire. Header would always show and needs to be 810 x 75 pixels (This is optional).
Next, connect the app to an Instagram Account. This should be an account that can be visible to those entering the contest. There is a provided button to do this process on the page.
Set a Contest Hashtag. It is IMPORTANT to specify a unique hashtag that is specific to you and not in use with loads of entries!
After setting the hashtag, then you have the option to select if you want to be alerted to new images via a daily summary e-mail. Also, you can set (shown below) if you want to pre-approve all entries before they go live.
The Pre-approval option hides entries from public on tab but Page Admin can see them. Admin can approve or hide any image right on the Facebook Page tab.

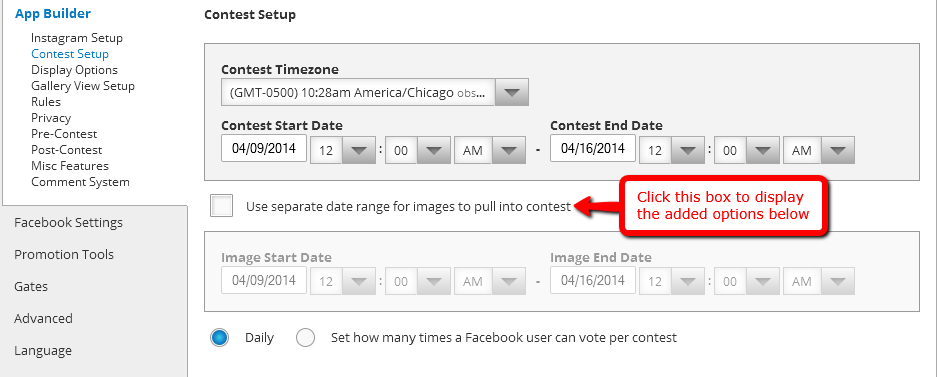
Set the date the contest is to go live and end. This is the start of the actual contest of when images would be visible to vote on. There is ability to have Pre-Contest message and countdown time setup and live before the go-live date.
Image Start Date (shown below) is optional. If set, this restricts images that are options to only those uploaded during these dates. This is helpful in case someone loaded a picture months ago and goes back and adds your contest hashtag. By setting the Image Date, you are only allowing new entries uploaded during the dates you set.
Set voting frequency as noted below to either daily (1x in 24 hour period) or specific number of times. We recommend daily voting as this draws users back to your Facebook Page more often and helps boost their affinity to your Page.
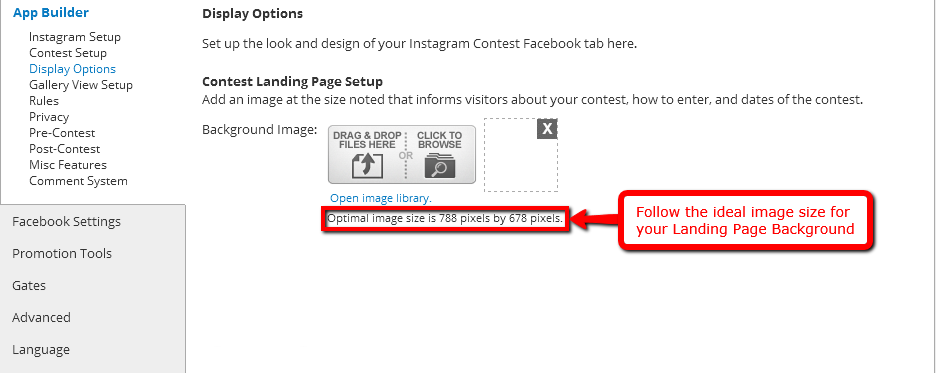
Setup the main layout of the contest. First image is the Contest Landing Page Setup image. This is the MAIN body image that describes your contest. Make sure to include your hashtag in this image!
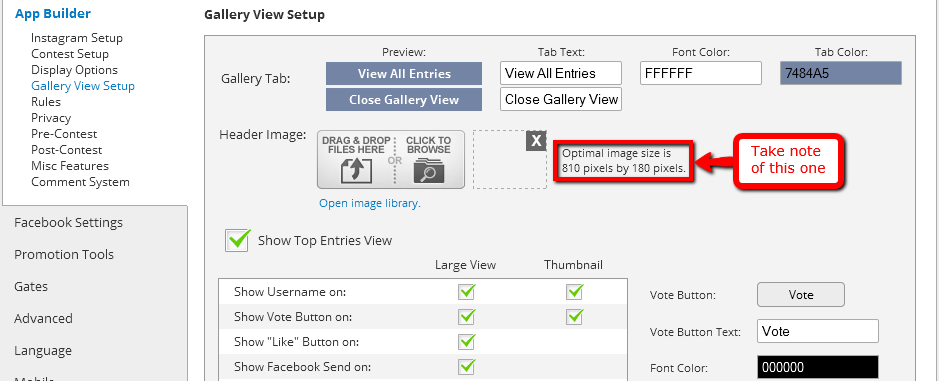
This is followed by customizing the tabs for viewing the Entries and returning to Landing Tab. You can customize text, font color, and tab color. The actual font is set.
The Header image right below is optional. If added, it appears on the main landing tab and on the gallery view of all entries. Both of these images noted above are fixed height and widths so set your image sizes accordingly.
Makes selections on the check-box below to customize what appears for entries. The vote button text can be customized as well as button color and text color. Actual font type is set.
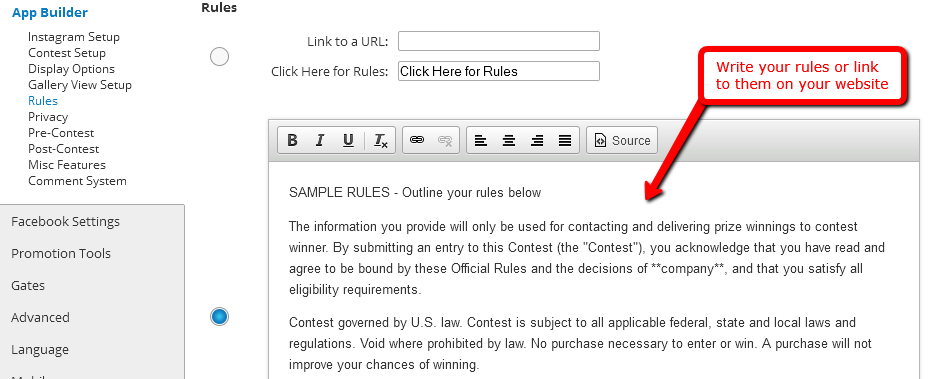
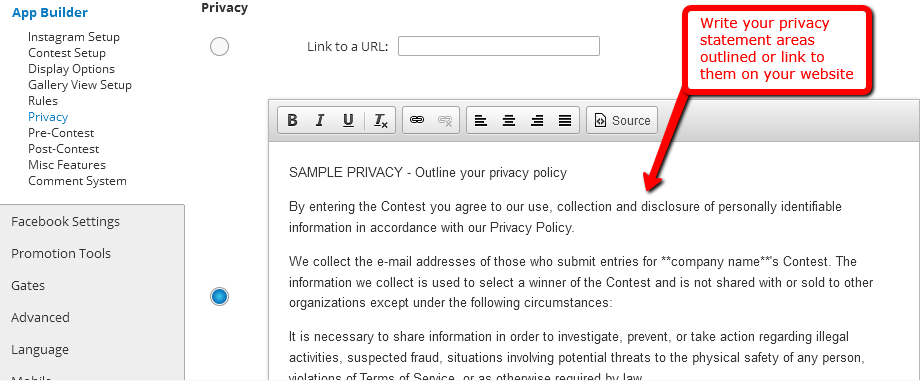
Be sure to outline the rules that you need in order to protect your company based on your state / country requirements. You can use the areas we provide (recommended) to include the rules and privacy links and keep viewers on the tab or you can link to an outside URL.
The instructions for Privacy are also the same as the one written in the Rules sub-setting.
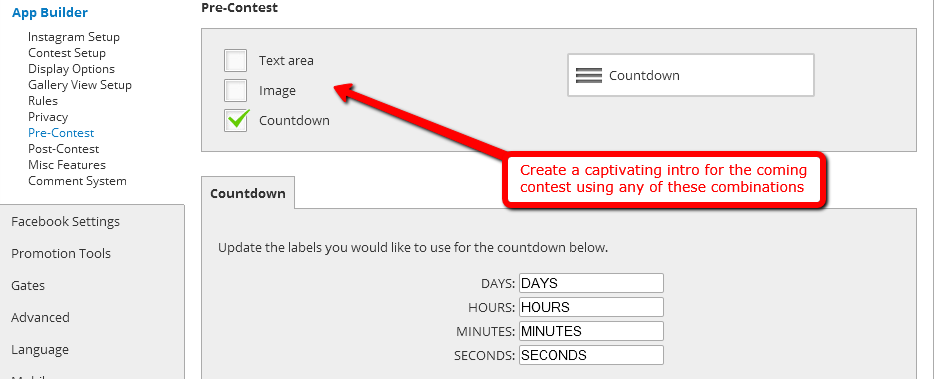
You can launch your tab and create attention for the coming contest by adding a Pre-Contest message. This can be any combination of Text, Image, and / or a Countdown timer. Use this to inform ahead of the start. The contest automatically moves to "Live" status on the date you set above in the manager.
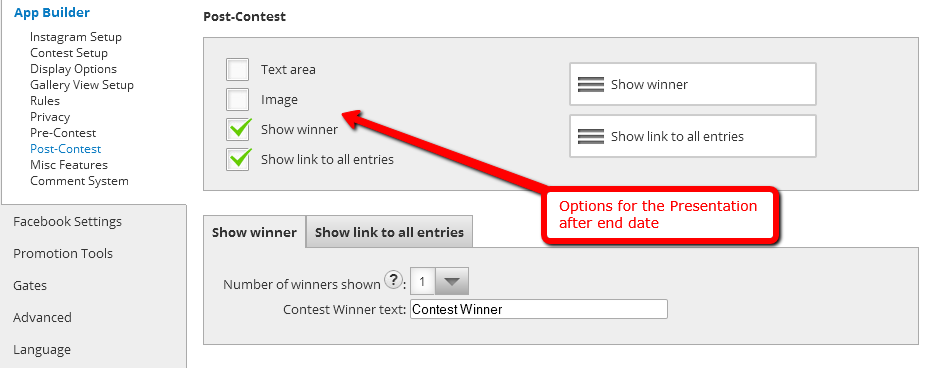
The contest will automatically move to display whatever you have set above after the contest end date you have set is reached. We recommend displaying winners and a message. This is another opportunity to draw attention and traffic to your page tab. Drag the Image, Winner, or Text to change display order.
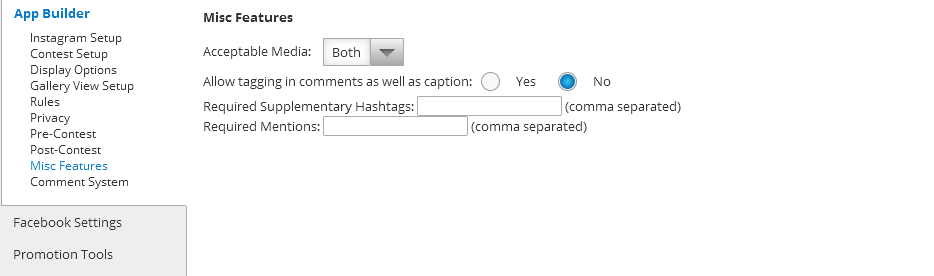
The ninth sub-setting is called the Misc Features. The options comprising this page are "Acceptable Media", "Allow tagging in comments as well as caption", "Required Supplementary Hashtags" and "Required Mentions".
The selections for Acceptable media include Video, Image and Both. Meanwhile, the Allow tagging in comments as well as caption is answerable by either Yes or No. In the case of Required Supplementary Hashtags, key in the additional topics associated with your contest. Meanwhile, for the Required Mentions, just enter in the blank fields the Twitter names of users you would like to mention in this contest.
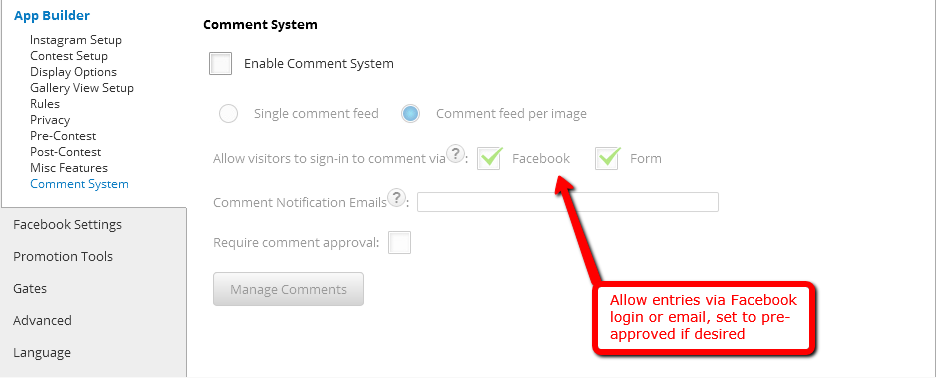
The last sub-setting for App Builder is Comment System. There is a primary option in the page called Enable Comment System, in which if clicked, the added options will display below. Upon checking the check box, you can select to either Single comment feed or Comment feed per image.
The first of the additional options that will display underneath is "Allow visitors to sign-in to comment via" where it enables us to sign-in via Facebook or Form before making a comment. The other option is "Comment Notification Emails" where you can enter in the field the email addresses of people you want to alert when a new comment is posted. The last one is the check box called "Require comment approval" where you have to approve the posted comments of the users first before publishing it .
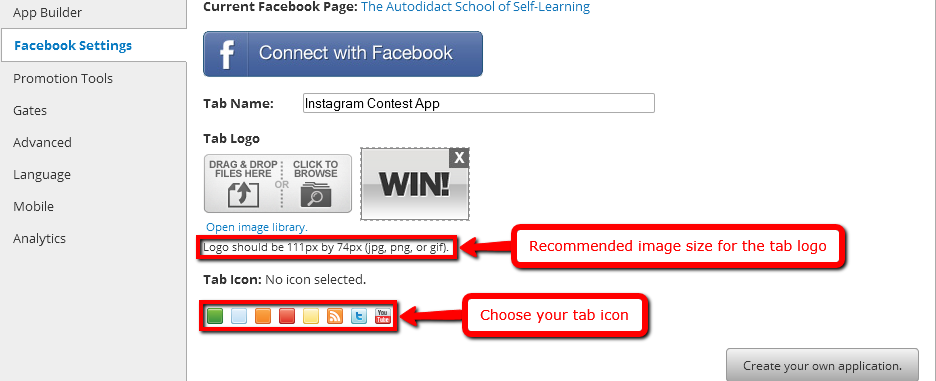
With the help of Facebook Settings, you can publish your tab to Facebook. You need to specify your tab name, upload a 111 x 74 pixel image for your logo and tab icon.
In the lower-right portion of the page, there is a button called "Create your own application". It implements just like what its name suggests and by the time you're already finished, it necessitates you to key in your App ID and App Secret to the blank fields alongside these variables.
The Promotion Tools is the third one in the settings list. It has three sub-settings comprising of Social Sharing Options, Blog/Web Call-out Tool and Post Planning.
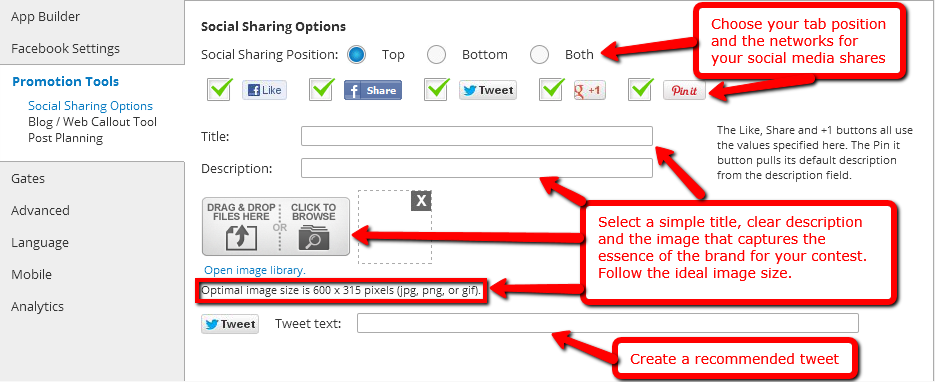
Set the Social Sharing buttons for other social networks you want on the tab. We recommend having them all to increase ease of sharing the contest! Customize the title and message in Facebook and Google + shares, and populate a recommended tweet. This is all more opportunity to brand your company, so, try to be strategic in your title and description as well as the share image.
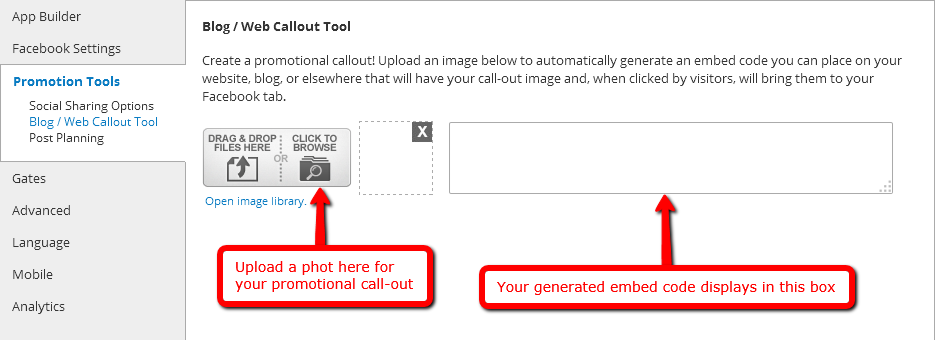
Generate added traffic by creating a promotional call-out using the Blog/Web Call-out Tool. All you have to do is upload a photo and it will then provide you an embed code. This code can be placed to your blog or website which, in turn, creates a call-out image. When this image is clicked by visitors, they will be directed to your tab on Facebook.
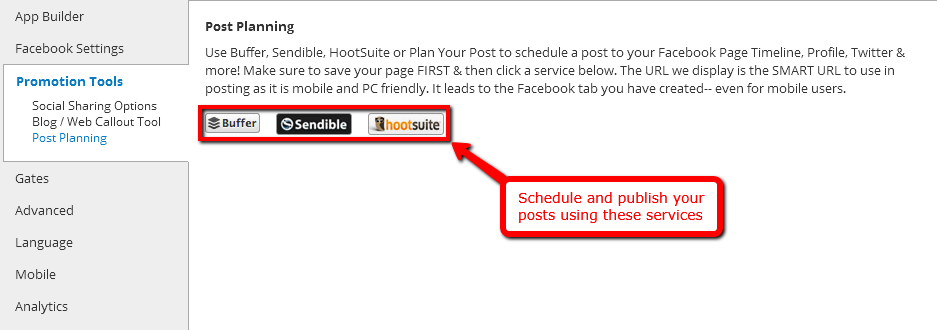
The Post Planning sub-setting allows post scheduling and publishing to various social networks. The three scheduling services we provide consist of Hootsuite, Buffer and Sendible. The generated URL we exhibit is the SMART URL since it is mobile and PC friendly. The shortened URLs forward your visitors to your created Facebook tab.
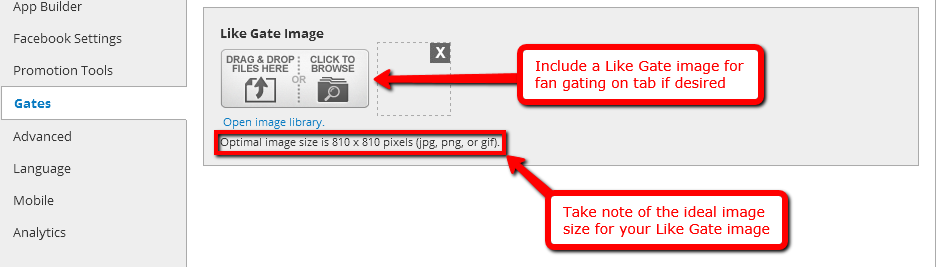
This section allows you to add an optional Like Gate for fan gating to ensure voters have Liked your page. Remember the ideal size for the image you'll be uploading.
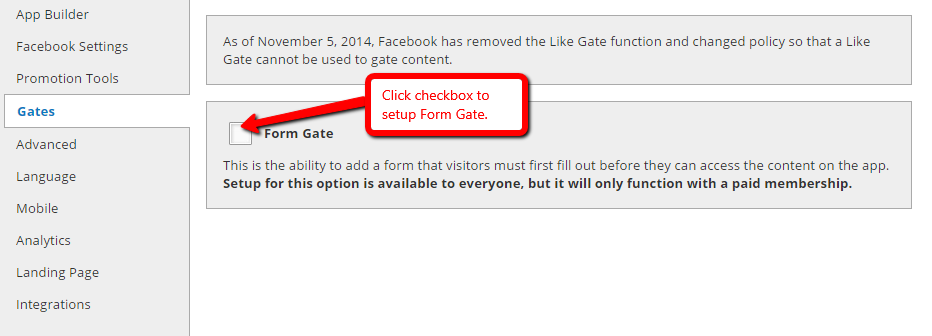
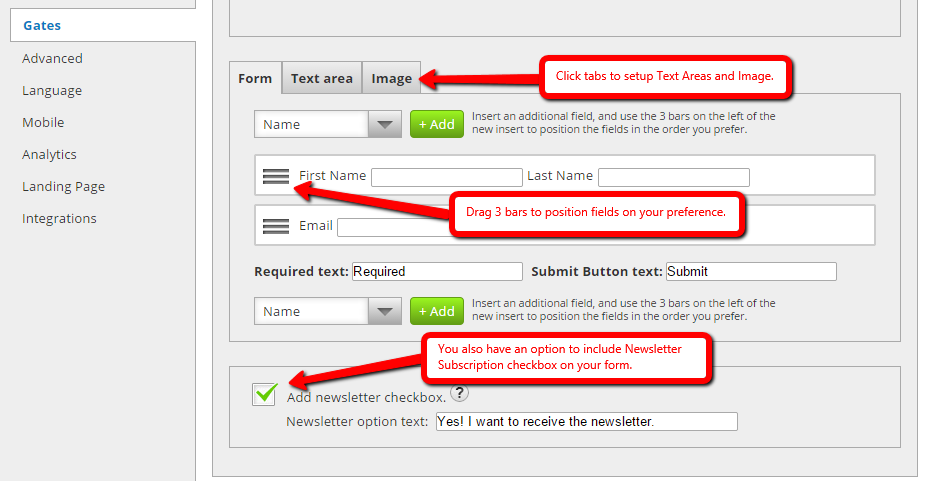
Form Gate is a simple form that users must complete and submit in order to access your app content.

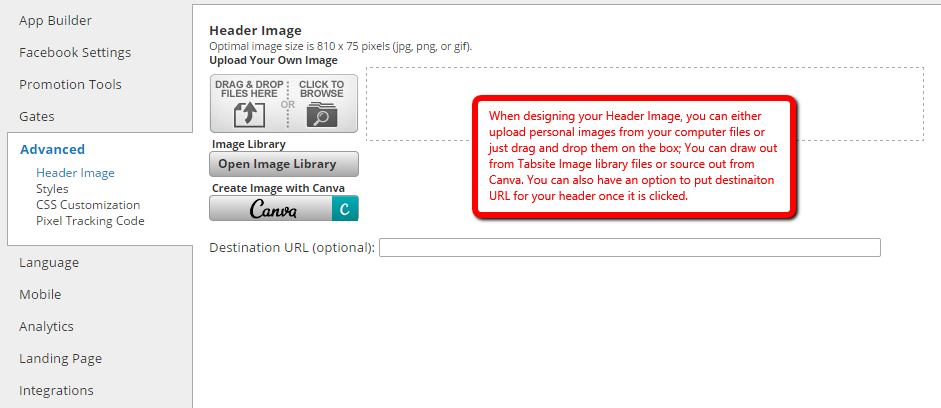
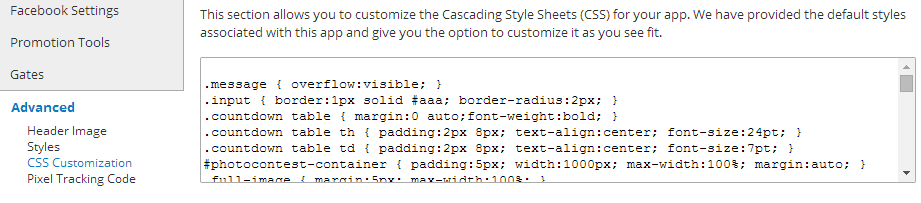
The Advanced Option lets you upload a 810 x 75 pixel header image for your app. It also enables you to set the styles of your tab like the color of your link, color of your text and the color of your background. Lastly, the CSS options can also be customized as we have already provided you the default styles for this feature.

Another feature to help you with marketing is to implement remarketing pixels! We have a Pixel Tracking code area for Facebook and/ or Google Ads. By installing the pixel code from those services, you are then able to target visitors to your promotion back on that service with ads. Simply paste the pixel tracking code that they provide.

The Language settings consist of Instagram Contest, General and Comment System.
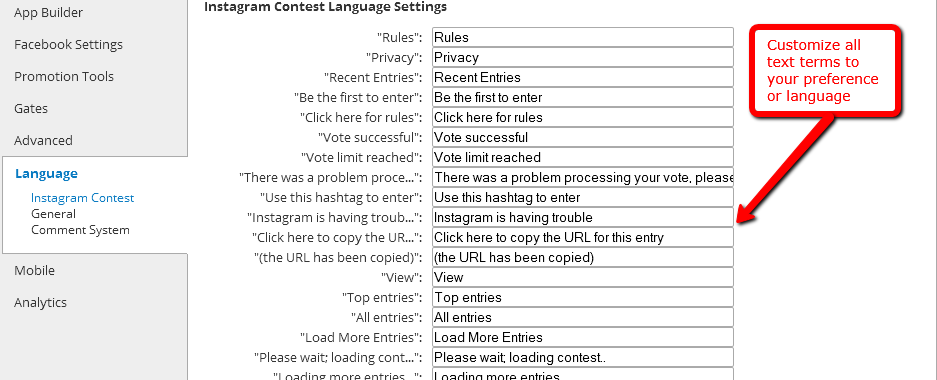
The Instagram Contest sub-setting section enables you to modify the text terms on the box provided to your own preference.
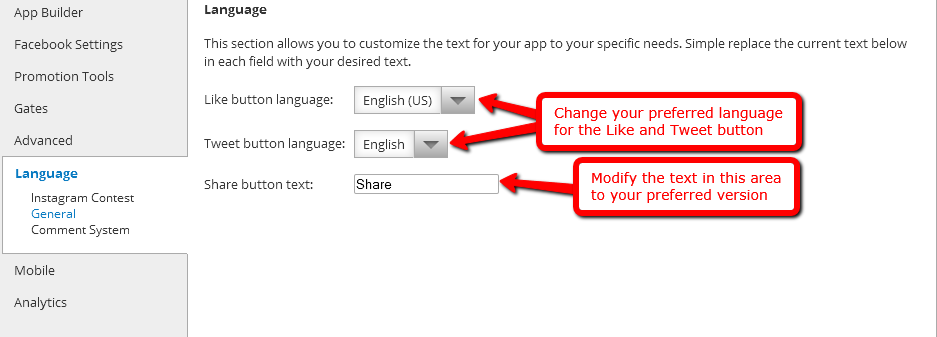
The General sub-setting is composed of two drop-down menus namely "Like button language" and "Tweet button language" which contains a large selection of languages. You can choose your desired language to show in your app's Like and Tweet buttons. When it comes to your Share button, simply customize the default text in the field beside it.
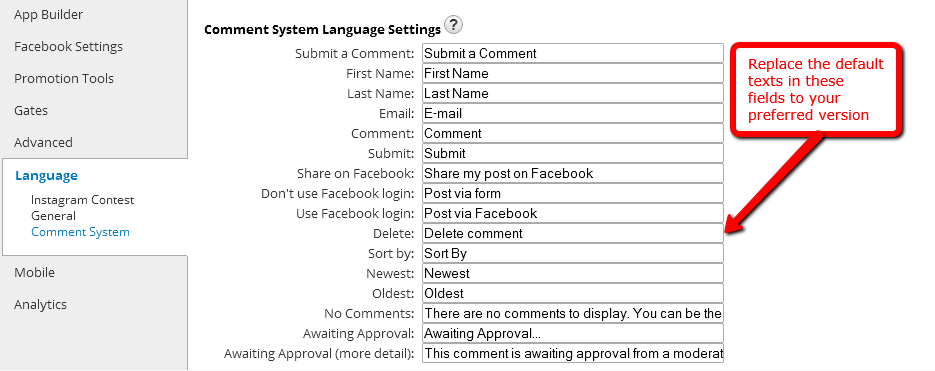
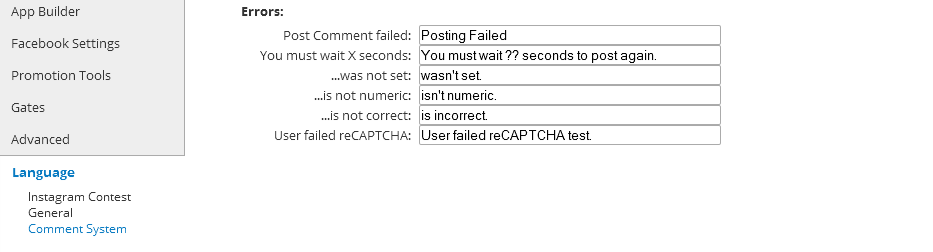
The Comment System sub-setting of the Language section has 2 parts; the Language Settings and Errors. Customize the default input information written on the fields of the variables.
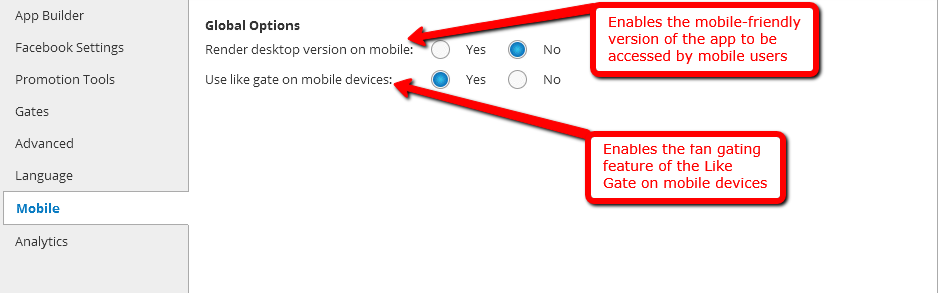
The Mobile section has two Global Options namely "Render desktop version on mobile" where it allows mobile users to gain access of the mobile alternative version of the app and the "Use like gate on mobile devices" to allow the fan gating feature of the Like Gate image to users. Note: Not all apps function with the Mobile Difference.
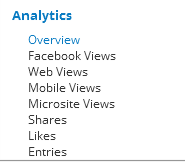
The Analytics section enables you to view the everyday traffic of your app as well as find out where this traffic is coming from. It is denoted by several graphs namely Overview, Facebook Views, Web Views, Mobile Views, Microsite Views, Shares, Likes and Entries.
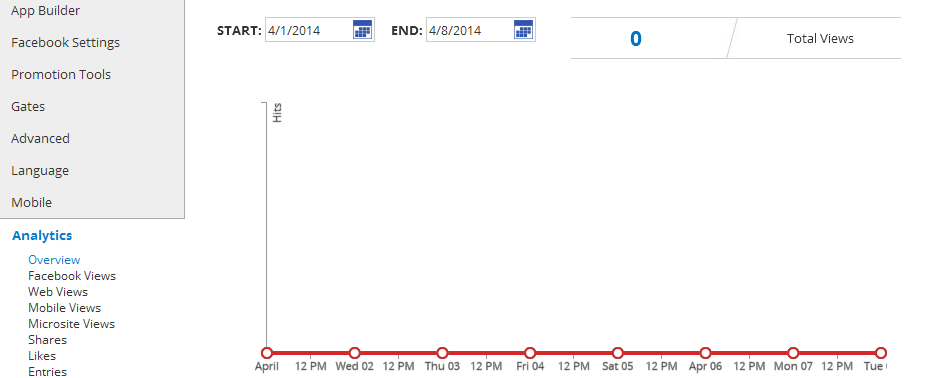
Overview Graph
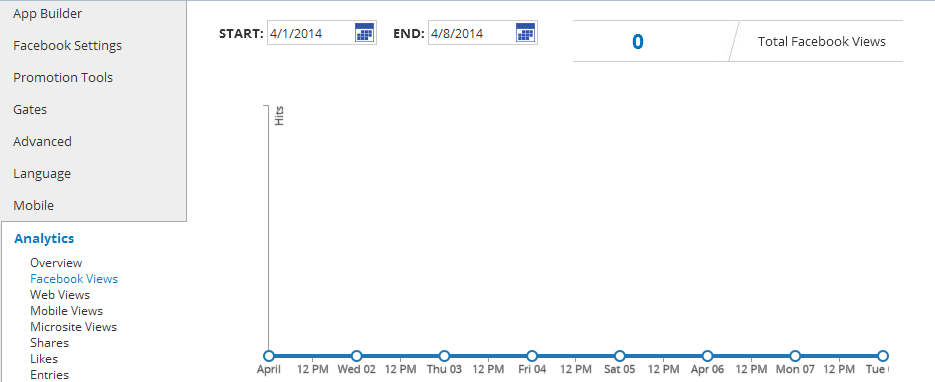
This is what the graphs of Facebook Views, Web Views, Mobile Views and Microsite Views look like when viewed
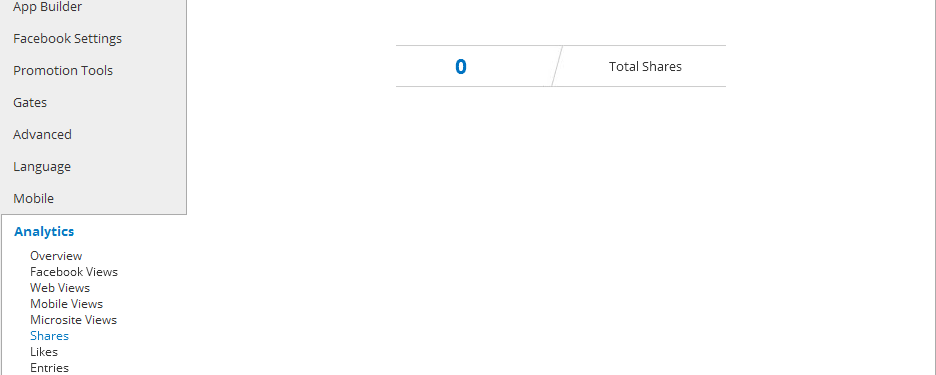
This is what the Total Shares, Total Likes and Total Entries look like when displayed on the screen
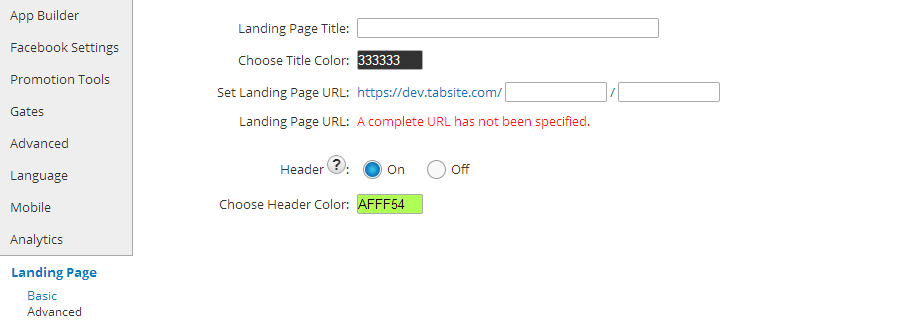
Landing Pages are a powerful feature allowing you to create lead capture pages using any app.
Create your own landing page directory name for your use on any landing pages. You create a name specific to your business such as https://tabsite.com/mybusiness/summerpromo(where "mybusiness" is your business name and the landing page is "summerpromo".)
Landing pages are the perfect area to drive traffic to in order to create more leads. Any app can have a Landing Page.
You may also change the title and header font color.
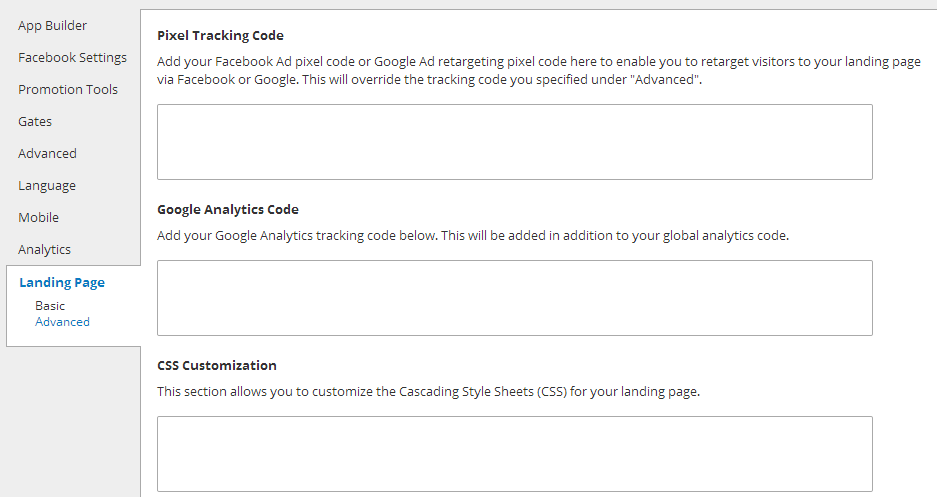
We give you the option to place the Pixel Tracking code for Facebook Ad's and/or Google Ad's on your landing page. This allows you to retarget/remarket to visitors via ads on those services.
In addition, we also offer CSS control for advanced styling of your Landing page as well to use if desired.
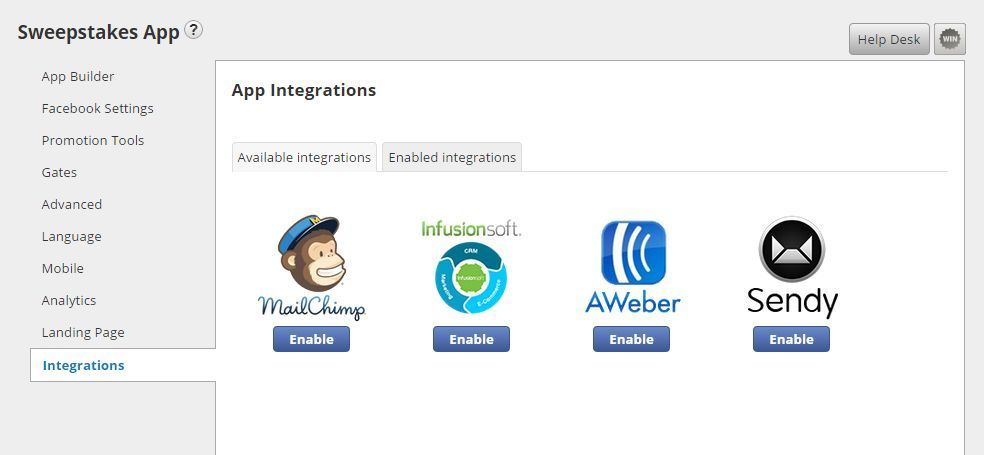
Integrations:
The "Integrations" area offers options for connecting forms to other services like Mailchimp, Infusionsoft, AWeber and Sendy.
See full details on the Mailchimp integrations here with steps for setup so that your form data is automatically added to your service provider.
See full details on the Infusionsoft integrations here
See full details on the AWeber integrations here
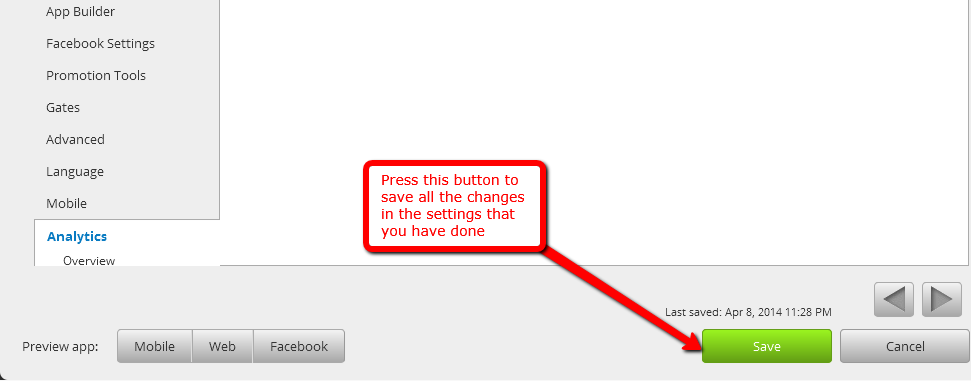
Tick the green "Save" button after you have done all the changes in the settings.
Upon clicking the save button, you will be directed to the My Apps tab, wherein all of your created apps can be found. You can add another app in this area, test it and publish it consistent with your Plan features.

Click "Publish" to publish your app and undergo the details of putting it to Facebook or a website.