Contests formerly had to be run solely via 3rd party contest apps on tabs like the TabSite Photo Contest App. Facebook recently loosened these rules to allow for more contest options and TabSite has responded to help Pages manage and run these additional options.
Now, businesses can launch a quick & simple Facebook contest that is in the news feed or embedded on a website using a normal post by the Page.
That means you can run a Timeline Contest that asks fans to enter the contest by:
- liking the post
- leaving a comment
- posting a photo
- etc.
If your timeline contest received 300 likes or comments, it could have been unruly to try and sort through them and select a winner. That's where TabSite comes in! We do that work for you!
TabSite's Timeline Contest app allows pages to export (to csv file for use in Excel type programs) and randomly select winners from a post on your Facebook Page. As well, TabSite paid plan users can run Photo Contests in the News Feed and easily get a export of all comments and photos on the photo contest post!
Additionally, TabSite users can create, customize, and launch their post from ready-made templates in the TabSite manager, making it easy to deploy, manage, and select winners via a timeline contest! Here's how...
SETUP:
For New Users (existing users skip to the next step) - Go to the TabSite Sign-up page and sign-up for a TabSite plan. Any plan, including free, can use the Timeline Contest App. Paid plan includes more features including:
- Option to have multiple winners selected
- Ability to Export Photo Comments on a Post (for photo contests)
- Ability to Filter comments by a keyword (for trivia contests)
- Ability to store up to 5 contest exports for future access
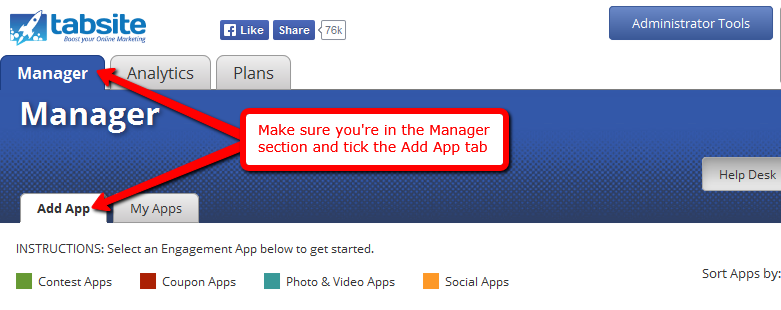
Go into the Manager Page then select the tab called Add App
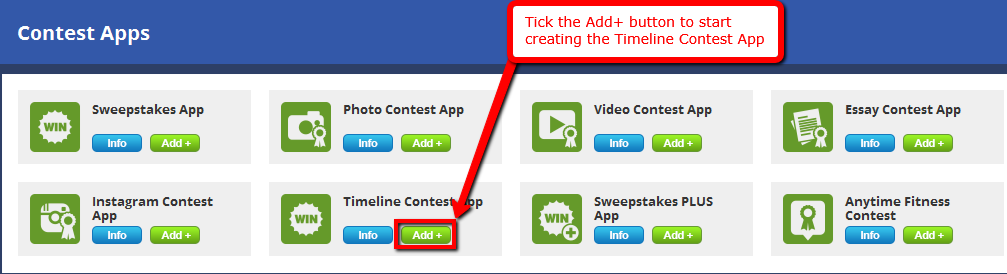
Then, scroll down the page and stop at the Contest Apps section. Look for the Timeline Contest App and click the Add+ button.
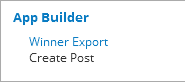
After clicking the Add+ button, you will be forwarded to the App Builder page. It has two sub-settings specifically Winner Export and Create Post.
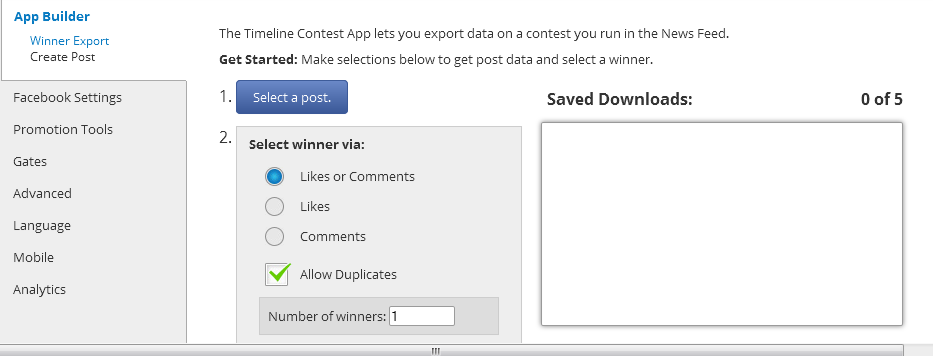
The first sub-setting is known as Winner Export. To select a winner from posts already on your Facebook page, you must first click the "Select a Post" button. This button connects to your page posts and pulls them in for viewing. After you import your posts, each one of them show the excerpt, created date, and number of Likes and Comments they received. Simply Click on the Post that you are using for the contest.
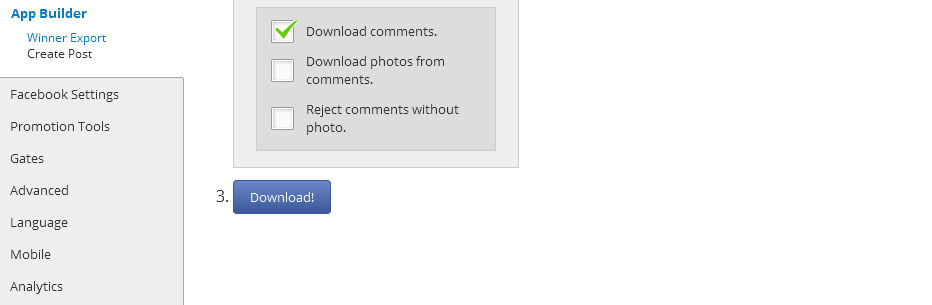
Proceed to the next step. Identify what criteria you were running your contest by. Again, it can be by Likes, Comments, Likes and Comments, and photos posted as a comment.
The "Allow Duplicates" can be checked or unchecked. If duplicates are allowed, then in a "Like or Comment" contest where the user Likes (1 entry) and comments (a different entry), that user has 2 entries. Same for Commenting. If "Allow Duplicates" is on for a Comment contest, then one user can comment 26 times and have 26 entries. If the box is unchecked, that user with 26 comments gets 1 entry. Number of Winners, Downloading photos, and rejecting comments without photos are features available at the Platinum level.
Click the "Download" button to download the csv file. This begins the export from Facebook process. We alert you with a note outlining that the process has begun and we will alert you in the manager and via email (email to the user account listed in Account Information). When you click the green download ready button or the Timeline Contest button, you will be taken to the Timeline manager where the Saved Download area on the right gives you access to download the csv file. Or simply click the link in the email notification you receive. For non-paid Plans, we store the most recent download only. For paid plans we store up to the most recent 5. At any time, simply delete the existing download to make room for a new download.Click the Post title to download the csv file the moment it appears in the Saved Download area. Photos are exported via a zip file download by clicking the Photos button next to the post.
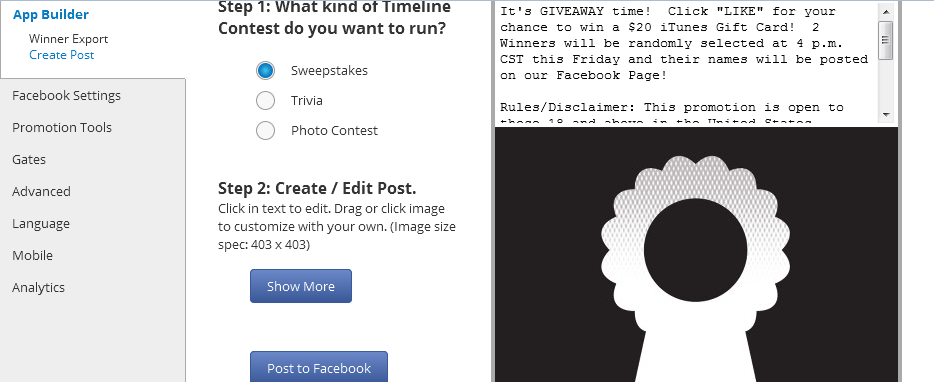
Click the "Create Post" tab to be given options to easily modify for:
• Sweepstakes (giveaways where a random winner is selected)
• Trivia (give users options and they must comment with correct answer to be eligible to win)
• Photo Contests (fans enter by adding a Photo Comment)
Simply select the type of post contest you want to run. Click the "Show More" button to see options. Then customize text and use our supplied image or click/drag to upload your own image and publish!
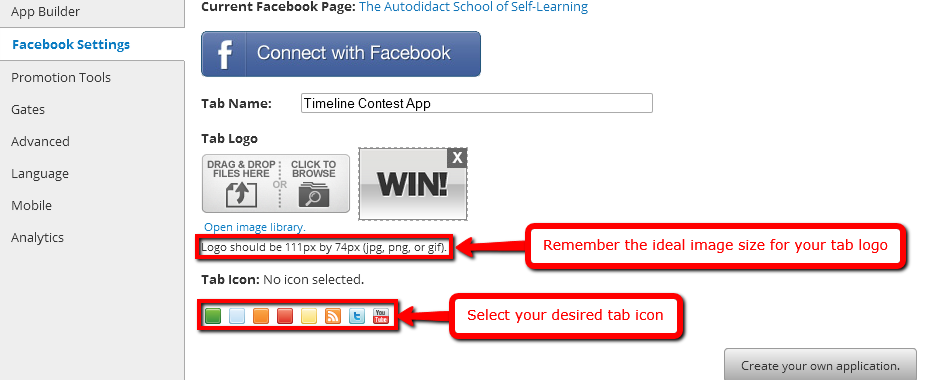
Share your app to Facebook with the use of Facebook Settings. First of all, connect your app to your preferred fan page. Then, indicate your desired tab name, a 111 x 74 pixel image for your tab logo and your tab icon. Click the button called "Create your own application" to execute the task it says. After doing so, you will be required to key in your App ID and App Secret on their respective fields.
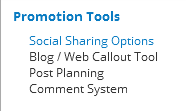
The next sets of sub-settings are under the Promotion Tools Setting. These sub-settings comprise the Social Sharing Options, Blog/Web Call-out Tool, Post Planning and Comment System.
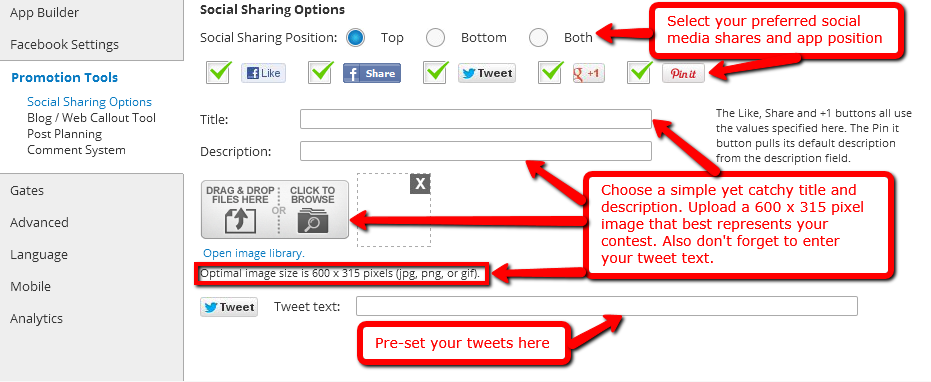
The Social Sharing Options is the first sub-setting of Promotion Tools. First, you will need to indicate your preferred app position, then select the social media sites that you would like to connect with by ticking their check boxes.
Next, enter a catchy title and description to grab the attention of online users with your contest. You will also need to upload a 600 x 315 pixel image. It would have to be an image that truly embodies the essence of the contest. Key in your tweet text in the field below, so as to pre-populate your tweets.
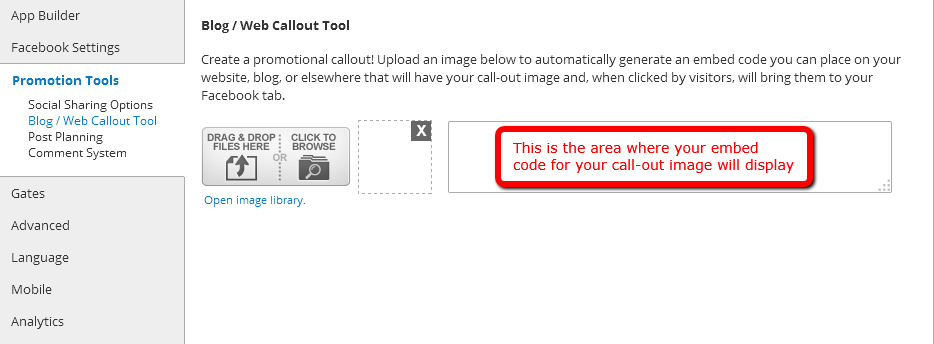
Create a promotional call-out image via the Blog/Web Call-out Tool. Simply upload an image to the uploading station and then, an embed code will be automatically generated. The embed code can be placed to various websites and blogs which will then display your call-out image. When visitors click this image, they will be transported to your Facebook tab.
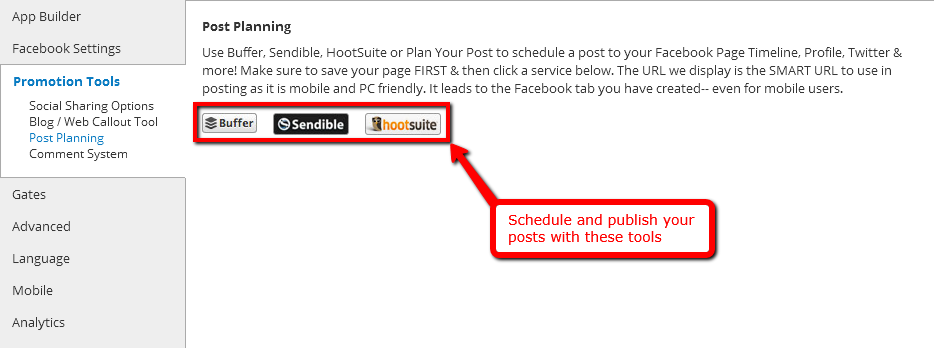
Use the Post Planning sub-setting to schedule and publish your posts to social networks. We offer the following scheduling services: Buffer, Sendible and Hootsuite. Before selecting one of them, see to it that you have saved your page in advance. The SMART URL is the type of URL we display for posting because it is mobile and PC friendly. It also directs the visitors to your created tab on Facebook.
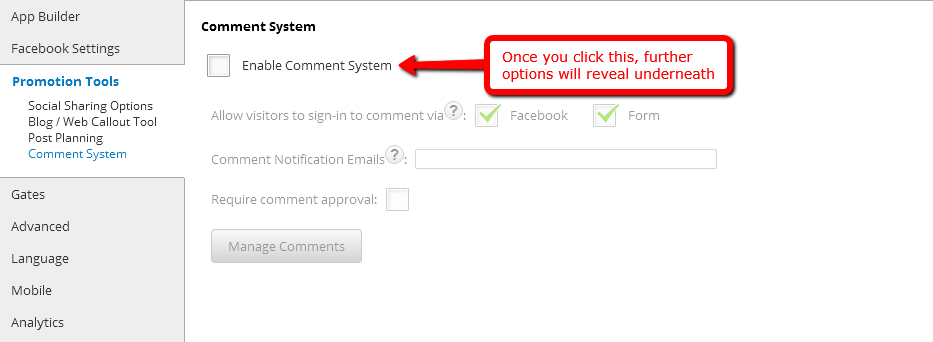
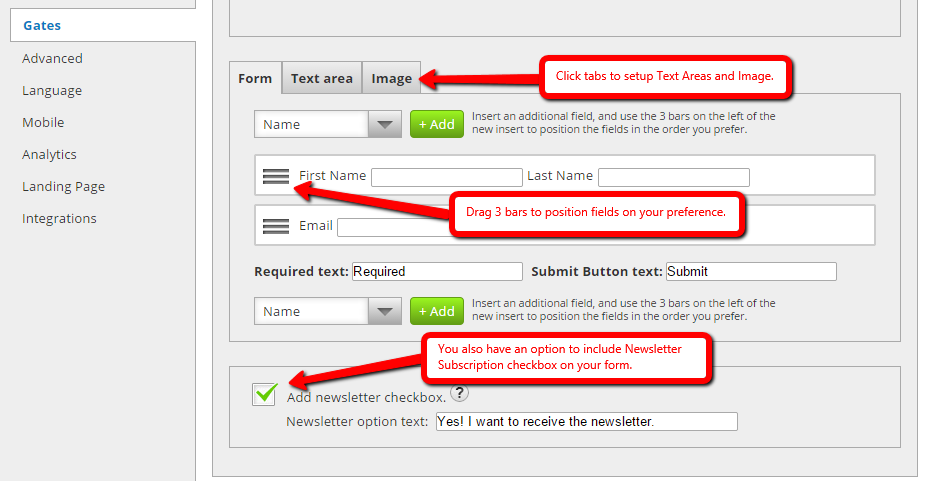
The Comment System is the fourth sub-setting of the Promotion Tools. This is an optional setting. Once you checked the "Enable Comment System"box, additional options will show up such as "Allow visitors to sign-in to comment via Facebook or Form", "Comment Notification Emails" and "Require Comment Approval. The Manage Comments button below lets you hide or post the comments you are receiving.
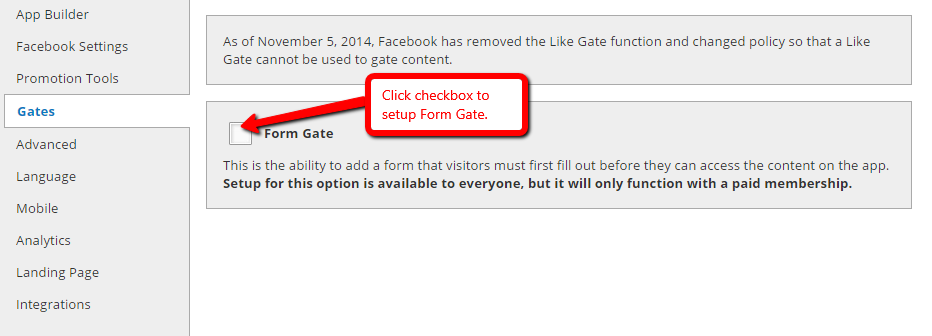
Form Gate is a simple form that users must complete and submit in order to access your app content.

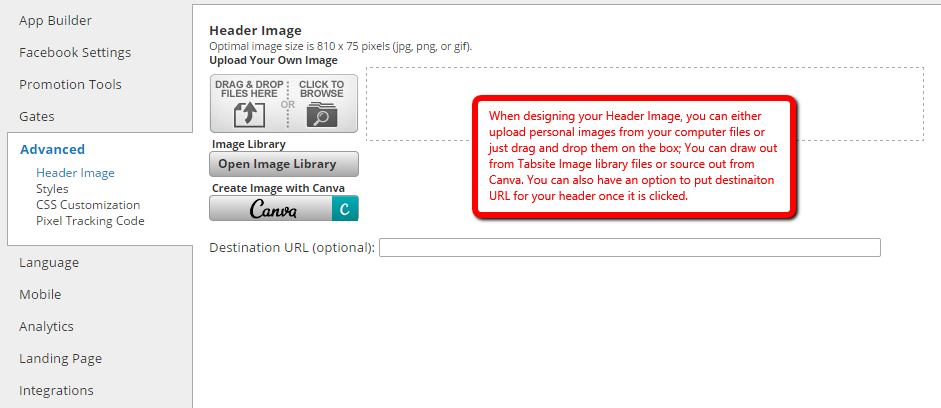
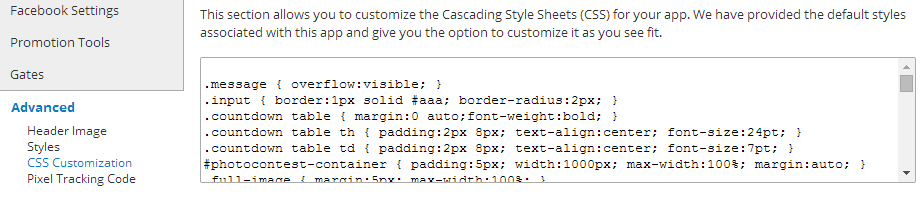
The Advanced option is the fourth in the list of the Settings page. In this section, we can upload a header image for our tab. The recommended image size is 810 x 75 pixels. Also, you can modify our tab styles such as the link color, text color and background color. Last but not the least, we also allow the customization of the CSS for your app. The default styles are already provided with this app and it's up to you how you want it to be.
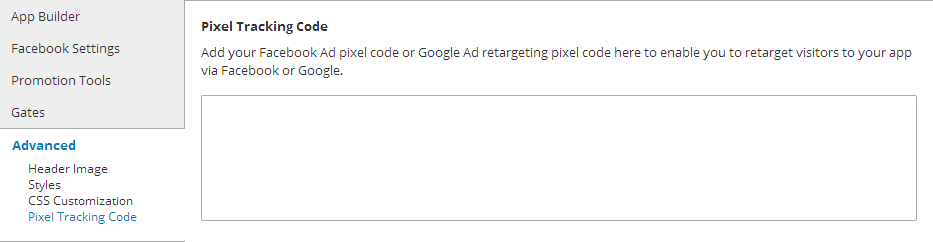
Another feature to help you with marketing is to implement remarketing pixels! We have a Pixel Tracking code area for Facebook and/ or Google Ads. By installing the pixel code from those services, you are then able to target visitors to your promotion back on that service with ads. Simply paste the pixel tracking code that they provide.
The Language section is composed of two sub-settings specifically General and Comment System.
The General sub-setting under the Language section lets you modify your preferred language for your Like and Tweet button language. These 2 options are in the form of a drop-down menu and contain numerous languages. Below these menus is the Share button text. Modify the default text in its corresponding field and replace it with your own version.

The second sub-setting for Language is the Comment System. It has 2 sections; the Language Settings and Errors. Simply customize the default texts into your own style by replacing each of them. Save your changes later.


The Mobile Setting is the next one on the list. There are 2 Global Options comprising it; the "Render desktop version on mobile" which gives an alternative version of the app content to mobile users or the "Use like gate on mobile devices" which exhibits the same information. Note: Mobile Difference does not apply to all apps.
If you want to know the amount of traffic entering your site and where it is coming from, just check the Analytics section. It is composed of various graphs to be precise Overview, Facebook Views, Web Views, Mobile Views, Microsite Views, Shares and Likes.
Overview graph
The graphs of Facebook Views, Web Views, Mobile Views and Microsite Views look like this one
The amount of Shares and Likes the app is receiving
Landing Pages are a powerful feature allowing you to create lead capture pages using any app.
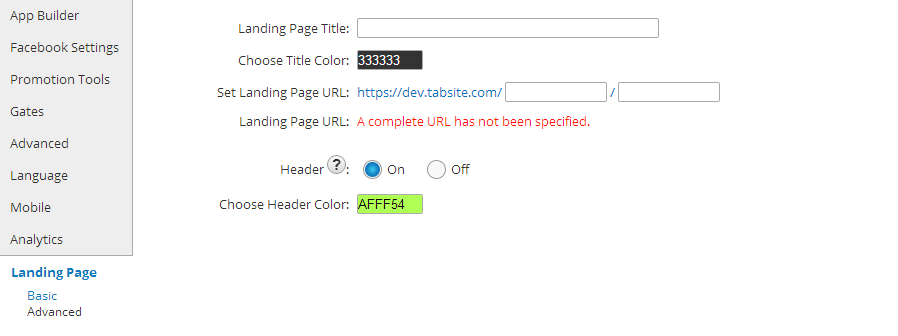
Create your own landing page directory name for your use on any landing pages. You create a name specific to your business such as https://tabsite.com/mybusiness/summerpromo(where "mybusiness" is your business name and the landing page is "summerpromo".)
Landing pages are the perfect area to drive traffic to in order to create more leads. Any app can have a Landing Page.
You may also change the title and header font color.
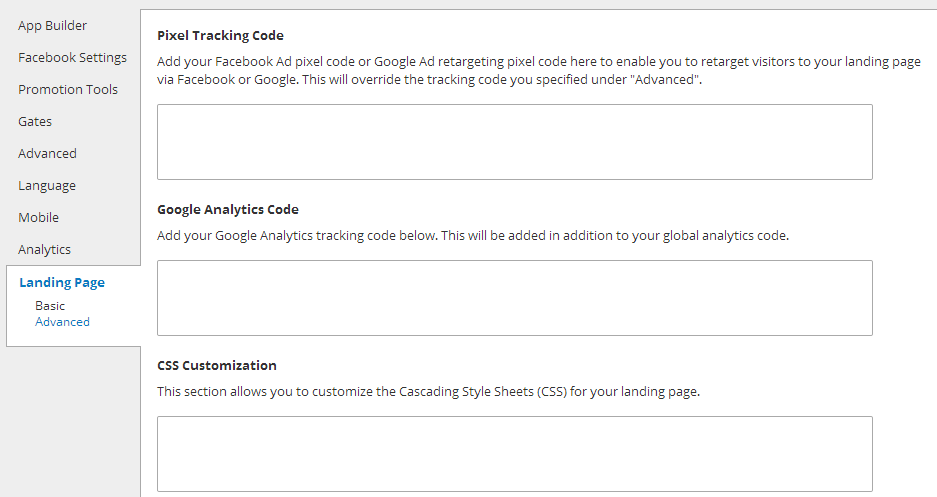
We give you the option to place the Pixel Tracking code for Facebook Ad's and/or Google Ad's on your landing page. This allows you to retarget/remarket to visitors via ads on those services.
In addition, we also offer CSS control for advanced styling of your Landing page as well to use if desired.
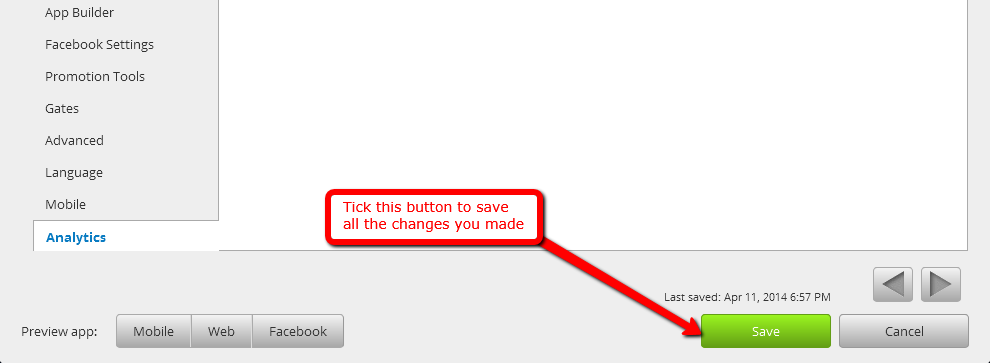
Finally, tick the green "Save" button after you have done all the changes
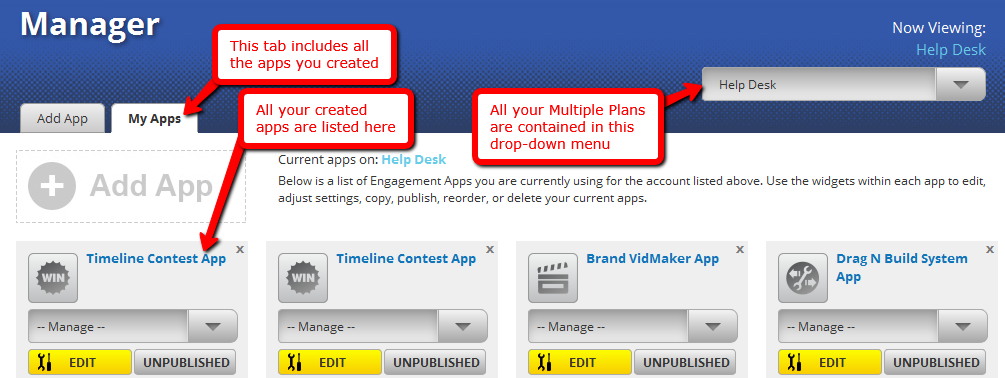
You will be directed to the My Apps tab after clicking the Save button. This section shows all your created apps. You can add another one, test it and publish it along with your Plan features.
Click the "Publish" button to go through the procedure of placing it to Facebook or in your own blog/website.