Display your Pinterest Pins or a specific Pinterest Board with TabSite!
Easily add your Pinterest user and display the pins you have posted to Pinterest. Additionally, there is the option to only display the Pins from a specific board. Social sharing tools are integrated to make it easy for users to Like, Share, +1, and Tweet your tab!
As well, fans can follow you on Pinterest right from the tab. The full, resized image is displayed for viewers to see in a organized, elegant layout. Available at the Standard Plan Level of TabSite.
Using the TabSite Pinterest tab benefits Facebook Page Admins in two ways. (1) Your popular Pins are available to the public and (2) Promoting your tab url helps viewers engage with your Facebook Page while also seeing your Pinterest pins, thereby driving and keeping more traffic tied to your Facebook Page.
Add a Facebook Comments stream so viewers can comment on the tab as well! Setup takes just a minute!
How to create a Pinterest App?
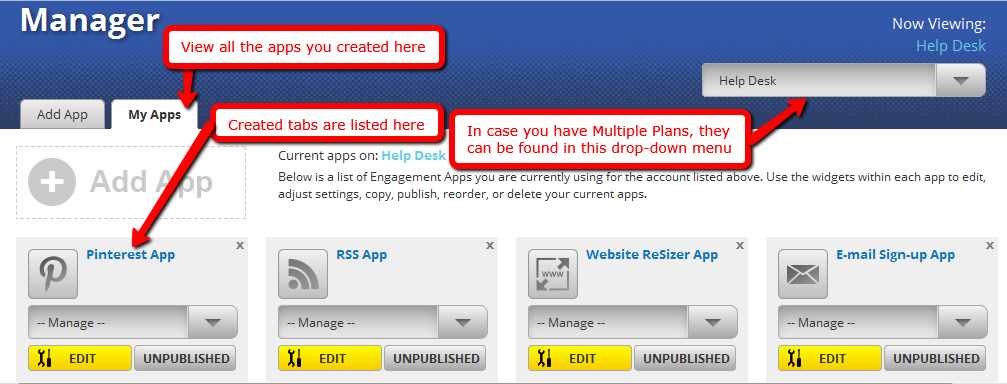
First, go into the Manager section of the page and select the Add App tab.
Then, scroll down the page and stop at the Social Apps section. Locate the Pinterest App and click the Add+ button to start creating it.
NOTE: Canva is now integrated in TabSite to allow you to custom template images in your app! Use Canva's or create your own by clicking the Canva button. Read more here.
The page will load and lead you to the App Builder page. In here, you can enter in the URL of your Pinterest account or one of your board's URL.
With the help of the Facebook settings, you are able to publish your Facebook tab. Simply specify identify your fan page, tab name and the desired look of your icon from the selections located underneath. In terms of your logo dimension, it is required to upload a 111 x 74 pixel image (accepted formats include jpg, gif and png).
The Promotion Tools section is the next one in the settings list. Its primary goal is to prepare your app for sharing in different social networks. The sub-settings comprising this section are the Social Sharing Options, Blog/Web Callout Tool, Post Planning and Comment System.
The first one in the list is known as Social Sharing Options. You can modify in here the social networks you would like to share your app with. These networks include Facebook, Twitter, Google+ and Pinterest. You can place the app to any portion of the page, whether on the top, bottom or both.
As the Page Admin, you can do the engagement process of these networks such as the Like and Share feature of Facebook, the tweeting feature of Twitter, +1 of Google+ and the Pin it of Pinterest.
Drive traffic to your tab by inserting a promotional call-out to your website, this can be possible by the use of the Web/Callout Tool. What you can do is to upload an image and by doing so, an embed code will be automatically-generated to you. This embed code can be placed to your blog, website or other websites. Your Facebook tab can be accessed by the visitors when they click this tool,
The Post Planning section is the third sub-setting of the Promotion Tools. It provides sheduling services to your posts in various social media networks through the help of any of these 3 programs: Hootsuite, Buffer and Sendible. The displayed URL that can be used in posting is the SMART URL because it is PC and mobile friendly. It forwards to your created tab on Facebook (it also works for users of mobile devices).
The last sub-setting of Promotion Tools is the Comment System. In here, there is a primary option called "Enable Comment System" which if checked, will reveal additional options below. The next option is called "Allow visitors to sign-in to comment via" where you can allow your visitors to post comments to Facebook, Form or both of them. The next field is the "Comment Notification Emails" where you can enter in the email addresses of users you want to receive alerts whenever someone makes a new comment. The last field is the "Require comment approval" where you can choose to approve the posted comments before they can be published or just publish it right away. There is a button below the options called "Manage Comments" where it works just like what its name suggests.
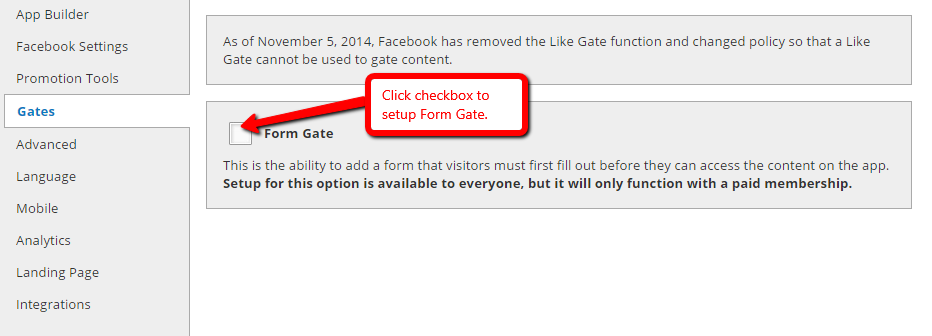
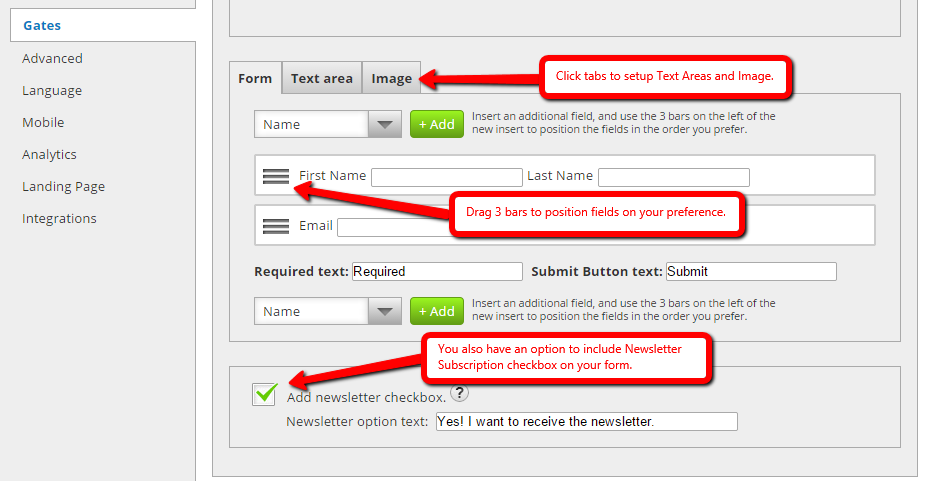
Form Gate Image

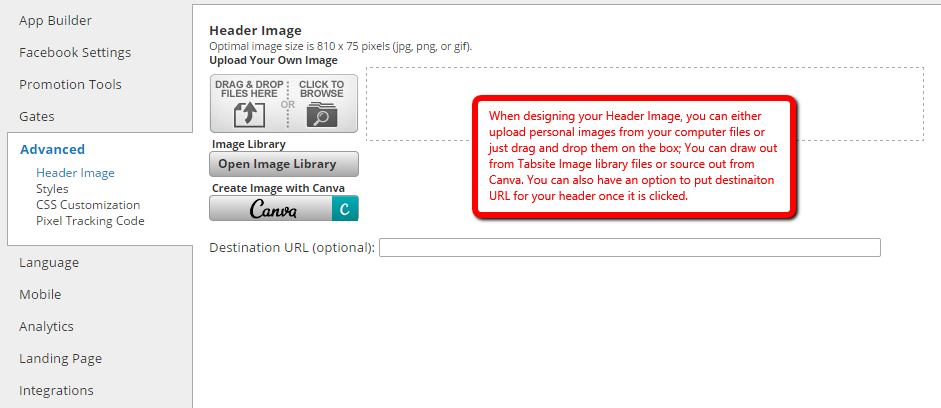
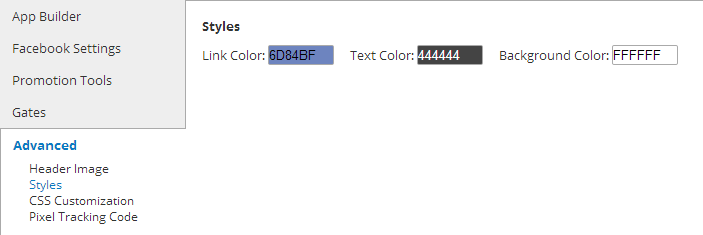
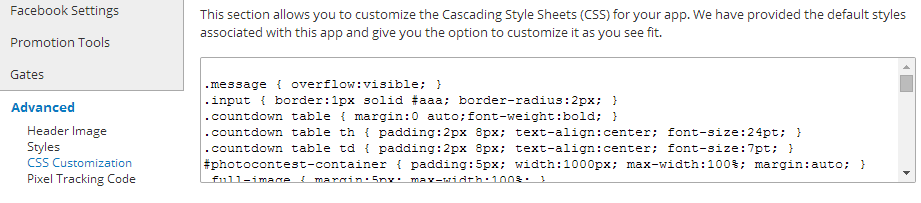
The Advanced Settings enables you to upload a header image (recommended size of the image is 810 x 75 pixels), optimize your link color, text color, background color and button color. You are also able to customize the CSS for your App. There are default styles connected with this app that are provided by this setting.
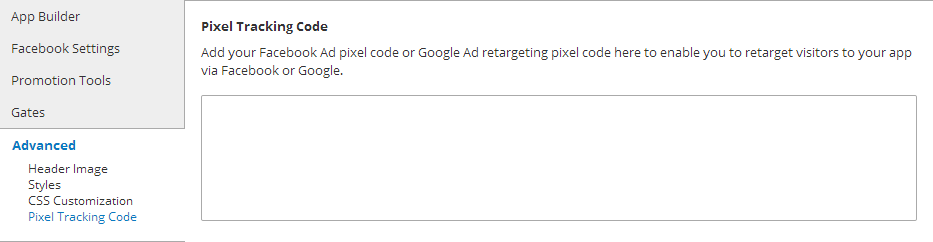
Another feature to help you with marketing is to implement remarketing pixels! We have a Pixel Tracking code area for Facebook and/ or Google Ads. By installing the pixel code from those services, you are then able to target visitors to your promotion back on that service with ads. Simply paste the pixel tracking code that they provide.
The Language setting is comprise of two sub-settings namely General and Comment System.
The General sub-setting under the Language section lets you modify your app's text suited to your needs. There are two drop-down menus in this section, the "Like button language" and the "Tweet button language." Even if English is the default language, these menus has a list of several languages you can choose to display in your social media platforms. The default texts written in the "Share button text" and "Pinterest Follow Button text" fields can be replaced with your preferred text.
The Comment System has two sections, the "Comment System Language Settings" and "Errors". The section allows you to customize your text for your comment system to your preferred language and needs. Adjust the written texts to your own version and save when you are finished.
The Mobile settings is comprised of two Global Options, they are "Render desktop version on mobile" and "Use like gate on mobile device". These settings can be customized by choosing either yes or no and enables your app to be accessed by mobile users in a form of a mobile-friendly alternative version or display your gate image. Take note that not all apps work with the mobile difference feature.
The last but definitely not the least setting is the Analytics. It lets you see the daily traffic performance of you app in addition to where this traffic is coming from. The graphs that make up this section comprise of Overview, Facebook Views, Web Views, Mobile Views, Microsite Views, Shares and Likes.
When users view the Overview graph, this is how it displays on the screen
In terms of the graphs of Facebook Views, Web Views, Mobile Views and Microsite Views, this is how it is viewed by users.
This how the graphs of Shares and Likes look like when displayed on the screen.
Landing Pages are a powerful feature allowing you to create lead capture pages using any app.
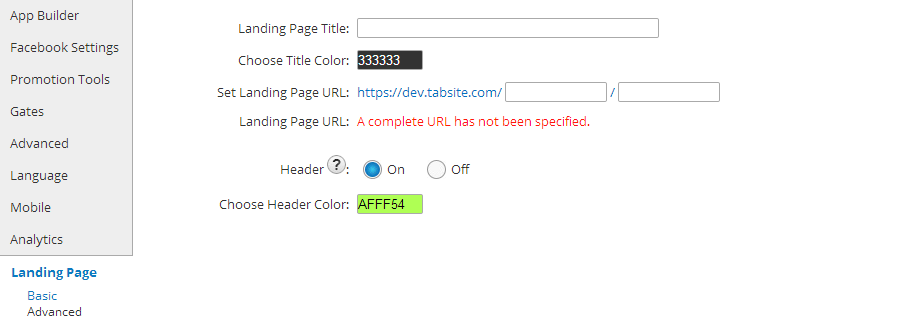
Create your own landing page directory name for your use on any landing pages. You create a name specific to your business such as https://tabsite.com/mybusiness/summerpromo(where "mybusiness" is your business name and the landing page is "summerpromo".)
Landing pages are the perfect area to drive traffic to in order to create more leads. Any app can have a Landing Page.
You may also change the title and header font color.
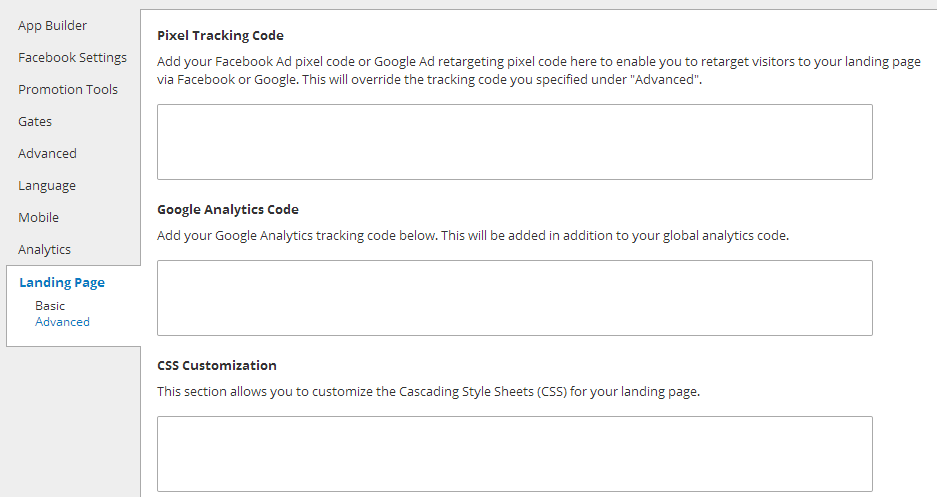
We give you the option to place the Pixel Tracking code for Facebook Ad's and/or Google Ad's on your landing page. This allows you to retarget/remarket to visitors via ads on those services.
In addition, we also offer CSS control for advanced styling of your Landing page as well to use if desired.
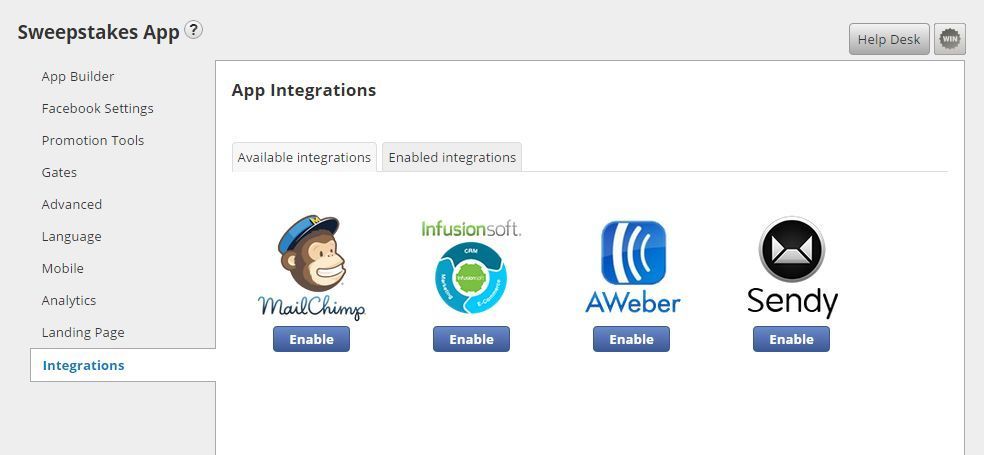
Integrations:
The "Integrations" area offers options for connecting forms to other services like Mailchimp, Infusionsoft, AWeber and Sendy.
See full details on the Mailchimp integrations here with steps for setup so that your form data is automatically added to your service provider.
See full details on the Infusionsoft integrations here
See full details on the AWeber integrations here
Press the "Save" button when you're already done with the changes you made.
You will be taken to the My Apps tab after pressing the Save button. All the apps you created for your TabSite Plan can be seen here. You are able to create other apps, test it and publish it in accordance with the features of your Plan.
Simply click "Publish" to undergo the steps of publishing your Pinterest App to your blog or other websites.